Originally posted at
Mobility Site in the X50 / X51 Forums/Tips and Tricks forum as multiple posts under the pseudonym, Jogga. It's the last in my series of setting up FinchSync to synchronize WinMob devices with Ubuntu.
Syncing Multiple PCsIf you want to sync multiple machines and aren't bothered about keeping your data separate (for instance, work and private information), you can simply create an Alias client server on the PDA.
- Set up the server information on your PC (following the instructions in Post #2)
- Create the Sync Sources on your PC
- Create your Client and allocate the Sync Sources (just follow the instructions in Post #2)
- Set up the server information on your second machine (again, following the instructions in Post #2)
- Add the same Sync Sources on your second PC with exactly the same name(s)
- Create a Client and allocate the Sync Sources
- On your PDA, set up the first server as per the instructions in Post #3
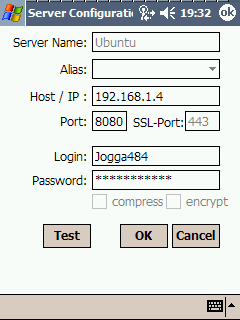
- Add a second server, giving it a separate name but add the name of the first server as an Alias in the Alias dialogue box


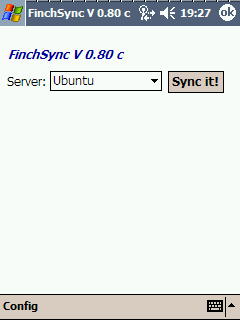
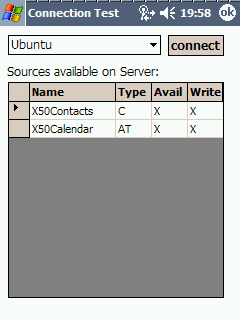
As you can see, the first screen shows the Ubuntu server settings and the second shows my laptop with the Ubuntu server name (ironically enough, Ubuntu) in the Alias drop-down menu. When you Test the server connection settings, you'll see the server name (in this case, Laptop) with the Alias in brackets.

Now, data will happily travel between PCs and your PDA: you can (apparently) set up as many machines as you wish. I am currently sharing (and syncing) data between a desktop (Ubuntu – Karmic), a laptop (Windows XP) and my Axim X50 – all wirelessly!
Uninstall FinchSync from Your PCI can't imagine why anyone would want to uninstall this remarkable program from their PC, but if you do, simply delete the FinchSync directory (the folder and all its contents that you created in Post #2): that's it!
Uninstall FinchSync from Your PDARemoving the application from your PDA is a little more complicated. First, you delete your servers from the Server list (this is a manual process).
- Open FinchSync on your PDA
- Tap Config
- Tap Server
- Select each entry in turn and tap Remove
- Tap Yes on the dialog box each time it appears
According to the FinchSync documentation, this removes all synchronized items from your Pocket PC! Now you can simply remove the programme using the Remove Programs option in the usual manner.
Additional information:
”Two small configuration files may be left by the uninstaller. To remove these files, use the 'File Explorer' to navigate to the folder 'My Device/Program Files' and delete the folder 'FinchSync'.”
From the FinchSync Documentation
Avoid Corrupting Your DataBefore synchronizing your PDA close Thunderbird on your desktop and all Outlook programs on your PDA. I can't stress this enough: if you synchronize with Thunderbird open, you will corrupt or delete your data – Don't say that you haven't been warned.
Good practise dictates that you backup your data regularly and your contacts and calendar data is no exception. The good news is that it is relatively easy to write a simple shell script that can automate the process of closing Thunderbird and opening the FinchSync GUI.Open a text editor (not a word processor) such as gedit or (my favourite) Scite and type the following into a new document:
#!/bin/bash
#Run FinchSync from a single command line
killall /opt/thunderbird/thunderbird-bin
# Closes Thunderbird before opening Finchsync as recommended by Markus Rahiff
cd /home/[usrname]/finchsync
# Changes directory
java -jar finchsync.jar
# Executes Java GUI
Save your file in your /home/[usrname] directory as, finchsync.sh. Obviously, the spelling and file extension are important: so get it right!
Now you need to make the file executable. Open a terminal and, if you have stored your file your home directory, type:
chmod +x finchsync.shIf you want to test the code, simply type:
./finchsync.shAnd the FinchSync GUI should appear. From now on, you can open the GUI from a terminal simply by typing the command above, saving one whole line of command and several characters from the second line. However, you will still need to open a terminal and type the command in order to access the GUI: wouldn't it be so much better to have a clickable icon on your desktop panel? Fortunately, Ubuntu makes this easy to set up.
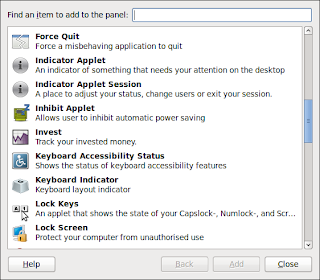
Right-click on the panel where you would like your icon and select Add to Panel from the drop-down menu. The Add to Panel dialog box should open:

Select the Custom Application Launcher and click Add. The Application Properties dialog box will appear.

- The application type is: Application
- The application name is FinchSync
- The command is the directory path and file name. For instance, my path looks like /home/jogga/finchsync.sh – the applet recognizes this as an application because you've made the file executable with the chmod command.
- The comment can be anything that you want. When you hover your mouse over the icon, the system displays the application name and your comment, so make the comment relevant to the operation of the icon
Click the icon and watch the GUI open as if by magic! Ironically, it takes longer to type (and read) these instructions than to actually execute them. I hope that you'll find this a useful mod to your system.
Working with Microsoft WindowsThe process for creating and opening the FinchSync GUI is (very) slightly different on Windows. I've only installed it on XP, but having created the directory and copied the Java file to the folder, there is no need to run code at a command prompt: just double click the Java file (called “finchsync Executable Jar File 738KB”) and the GUI will open.
Pretty much everything else is the same as per the Ubuntu instructions although in Windows, the IP address in the status bar of the GUI seems to be the correct one.
Killing the Server using a Web BrowserSimply type
http://[ip]:[port]/status into the web browser address bar, type in the user name and password created in Post #2 and click Stop Server.
I find that just exiting the application is sufficient, but there you go!


