Showing posts with label Hardware. Show all posts

Wednesday, 28 January 2015

Extending the Life of your Kodi Remote (& Your Mobile Phone)

I seem to be blogging about my mobile phone more than Linux at the moment. This is mostly because my phone is doubling up as my Kodi remote and it is a fabulous free/sunk cost alternative to purchasing new hardware (which may also require modification to work). However, my Samsung GT-19070i is three years old in October and the battery life had started to be problematic: I could no longer get through the day without having to recharge my phone.

So, I've bought myself a new battery and now I've got more than 50% charge at the end of the day! This is cheaper than buying a new phone and I should (fingers-crossed) get another year out of the device before needing to upgrade. I read yesterday, that mobile devices can last a decade or more but, in our consumption-oriented world, we're locked into much sorter upgrade cycles: so, I'm also doing my bit to save the planet.

"The Linux-based Puzzlephone project wants to extend the life of smartphones by making more of the phone replaceable, on the premise that most of the hardware can last a decade, but consumers are locked into a much shorter upgrade cycle."

Sources & References

Wednesday, 14 January 2015

The HTPC Build - Final Specs

I finally got around to ordering the parts and building my HTPC: I'm thrilled with the results and the total build cost was less than £320.00!

So, here are the component specifications (aka parts list) & some detail about the operating system and media software.

Hardware

  • Chassis - Fractal Design Define Mini Series Micro ATX (Black Pearl). This is a stunning case which is beautiful for its simplicity. The optical drive is hidden behind the front (hinged) panel. Price at the time of purchase £56.98.
  • Processor - AMD A6 5400K Black Edition. This is my first ever build using an AMD processor and it took me a couple of minutes to figure out the FM2+ socket arrangements (perhaps I should have read the instructions first!). I've been stunned by the performance of this dual core processor and, from now on, I will always consider AMD for future builds. I'm using the stock fan for cooling which is as near silent as makes no difference and I'm thrilled by this budget processor - highly recommended! Price at the time of purchase £39.99.
  • Motherboard - Gigabyte GA-F2A88XM-HD3 (Socket FM2+): always a matter of preference, but I've always favoured Gigabyte boards. This board is tight to work on as you might expect, but it all went in and connected first time. Price at time of purchase £47.31.
  • Memory - 4GB G.Skill DDR3 PC3-10666 1333MHz Ripjaw Series. For a budget HTPC this is ample memory: however, if you intend to use your PC for other tasks (perhaps, vitalisation or video manipulation) you will want to ramp-up the RAM! Price at the time of purchase £35.95
  • Storage -
    • Boot Drive/OS - SanDisk 64 GB 2.5 Inch Internal SSD. Yes, I know that this won't be the fastest sdd available, but this was a budget build and I'm not writing huge amounts of data to or from this drive. It boots beautifully in under a minute and is, of course, silent! I've always been leery of Sandisk but this drive is changing my mind. Price at the time of purchase £32.18
    • Media Drive 1 - Weston Digital Green 1TB hdd - this is my salvaged drive from the NAS that failed last year. The drive still reports that it's OK (although, S.M.A.R.T recognizes it as an old drive) so it's been formatted and recycled. It's a sunk cost so I've counted it as £0.00.
    • Media Drive 2 - WD 1TB SATA III Desktop SATA Drive (Blue). I've not used this drive (although, I've installed it) - I still have over 400GB of space left on the first drive. Price at the time of purchase £40.60
  • Optical Drive - Samsung 24x DVD Writer. Other than the processor, this component is the best value for money in this build: this drive is superb. It comes with interchangeable bezels and is quiet (but not silent) in operation. Highly recommended! Price at the time of purchase &14.75.
  • Power Supply - Corsair Builder Series CXM 430W Modular 80 PLUS Bronze Certified ATX/EPS PSU. I've used and recommended these PSU for several years: they are quiet and reliable and packing plenty of bang for your buck. Yes, you can buy PSUs for under £20.00 - but don't! Price at the time of purchase £45.13
  • Networking - TP-Link TL-WN751ND. Another sunk cost but it's performing quite well. Nonetheless, I'll probably end up using a Powerline adapter and an ethernet cable in the long run. As a sunk cost, I've counted this as £0.00.
  • Peripherals -
    • Keyboard/Mouse - Logitech Wireless K400r. This is another sunk cost so I've counted it as £0.00. Nonetheless, I would recommend this keyboard for any HTPC project and, at the time of posting, it's worth every penny of the £27.15 that Amazon is asking.
    • Remote control - XBMC Remote running on my Samsung Advance GT-I9070P. Download the app free from Google Play or the Apple Store. Cost at the time of purchase £0.00 (excluding the hardware)
    • Speakers - DELL setup. Sunk cost counted as £0.00.

The connection to my Samsung TV is via the mobo's HDMI port. As a nice touch, you can rename your source (albeit from a predefined list) on your TV. You can also use the HDMI for sound, but I've opted to recycle my old DELL Dimension 8400 speakers which have always been of decent quality.

Software

The operating system is (after several false starts) Mint 17.1 with the Mate Desktop. Originally, I had planned on using Cinnamon, but I just couldn't get the graphics to play nice on the 43" screen. I also tried the openelec but, although it looked superb, it pretty much turned my brand new PC into little more than Apple TV. Nonetheless, Mate looks fantastic with the AMD Catalyst drivers & Control Centre installed and I don't need a graphics card. However, it would be nice to have a little more granularity over the graphics performance and I'm reserving judgement on whether to add a dedicated graphics card in the future.

For the HTPC software/media centre, I'm using Kodi (formerly XBMC): put simply, this is outstanding software and I'm still exploring all of its functions.

Conclusion

Notwithstanding several recycled/reused components, this little system is outstanding for around £300.00. The chassis looks beautiful and is endlessly upgradable: needless to say, I'm chuffed!

Sources & References:

Wednesday, 17 December 2014

Jogga's HTPC

Intended design of the HTPC (when I've saved enough money :)

Parts List

  1. CPU: AMD A6-5400K 3.6GHz Dual-Core Processor (£39.99 @ Amazon UK)
  2. Motherboard: ASRock FM2A88M-HD+ Micro ATX FM2+ Motherboard (£46.80 @ Amazon UK)
  3. Memory: G.Skill Ripjaws Series 4GB (2 x 2GB) DDR3-1333 Memory (£35.17 @ Amazon UK)
  4. Storage (Operating System & files): Kingston SSDNow V300 Series 60GB 2.5" Solid State Drive (£32.90 @ Amazon UK)
  5. Storage (Media): Western Digital WD Green 2TB 3.5" 5400RPM Internal Hard Drive (£59.90 @ Amazon UK)
  6. Case: Fractal Design Core 1100 MicroATX Mini Tower Case (£29.99 @ Amazon UK)
  7. Power Supply: Corsair Builder 500W 80+ Bronze Certified ATX Power Supply (£51.50 @ Amazon UK)
  8. Optical Drive: Samsung SH-224DB/BEBE DVD/CD Writer (£10.46 @ Aria PC)

Total: £306.71 (correct as of 17/12/14)

I'm living without a discrete graphics card (unless the build demonstrates a need to reconsider) and I'm recycling an existing TP-Link wireless card for networking. The speakers will probably be my existing DELL setup until I can afford a sound bar and I've already recycled a 1TB hdd from my busted NAS.

Control will be via my existing Logitech K400r wireless keyboard & my Samsung A3 advance smartphone.

The operating system will be Linux Mint 17 (obviously) although I have considered openelec. The media centre will be Kodi (formerly known as XBMC).

Criticism & advice welcome!

Sources & References:

Sunday, 5 October 2014

Fixing The Internal Microphone - Presario CQ60

It's taken weeks of Googling, but I've finally found a fix for the internal microphone on the Presario CQ60.

I had no luck with the various fixes that I found online until I came across this post which, if I've understood it correctly, suggests that the problem with the internal microphone on the CQ60 is not a software issue but a hardware problem. As I understand the OP's problem, the kernel allocates the wrong pin id at boot: the workaround turns out to be surprisingly simple.

First we need an application developed by David Henningsson at Canonical. It's called HDAJackRetask and it was originally developed to turn unused microphone jacks into additional headphone jacks - brilliant! It's now part of the alsa-tools-gui, so there's no need to add a new repository. Open a terminal and do:

sudo apt-get install alsa-tools-gui

Alternatively, you can download it from the Software Center or Synaptic. When prompted about the additional space (in the terminal method), type y and hit enter.

Open HDAJackRetask from the Main Menu (in Mint Cinnamon it's under Sound & Video). Select your sound card and then, under the Options panel, check the Show unconnected pins option. In the Pin configuration section, look for your Internal Mic, Riser entry, click the Override checkbox, and set the spin button to Not connected.

Next, look for the Pin ID: 0x1d, check the Override checkbox, and the use the spin button to select Internal mic. Now click the Apply now option and test your microphone. If all's gone well, it's time to make this a permanent change: click the Install boot override. You'll see the following message dialog: click OK and reboot.

Sources & References:

Friday, 12 September 2014

Another Careless Owner!

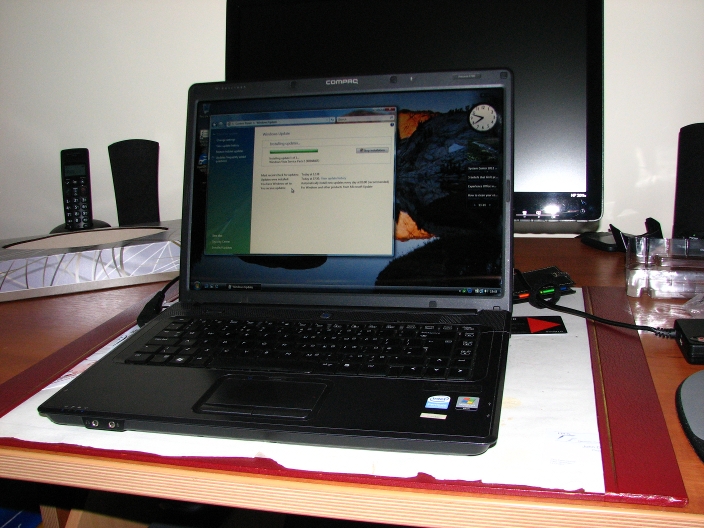
Last year I reported on finding an old Compaq C700 in the recycling skip: well, I've just found another in the same skip! This one's a Compaq Presario CQ60 & I managed to recover a working charger at the same time.

My first thought was that this would be suffering from a shot screen (all too common with Compaq laptops), but it's not and I can find absolutely nothing wrong with this little beauty. Apart from needing a new battery (I couldn't find the original) and hard drive (sensibly removed by the original owner), this laptop is perfectly operational right down to the webcam. There's no damage to the case aside from the marks and scuffs associated with normal wear & tear. That is, if you ignore the missing rubber bumper on the bottom of the case!

I've gone for a cheap battery (I don't expect it to last more than twelve months) but a 60GB solid state hard drive - I really do want to see how much of a performance improvement an ssd will deliver and I have no need for a massive hard drive. Total repair costs are circa £50.00 and it's a project for my daughter, Lozzy to cut her teeth on!

We won't be restoring the original operating system (Microsoft Vista) and the AMD Sempron processor probably isn't man enough to run Win7, so we'll run Mint 17 and keep this as a play thing.

Sources & References:

  • None

Sunday, 7 September 2014

NAS Woes

Some years ago I made the mistake of buying a Western Digital network drive - there's a reason that they're cheap! Anyway, this week the hard drive failed (or so I thought) and this morning I took the enclosure apart only to find that it was the capacitors that had given up the ghost.

blown capacitors in WD network drive
What's All that Goo?

Because the drive uses hardware encryption, the data is unreachable: I can't even mount the drive to attempt a recovery. Assuming that the drive is still healthy (smartctl -H results in an access denied error message), I'm faced with several options:

  • Try to recover the data by finding a replacement enclosure with the same model number (yeah, good luck with that!)
  • Try to recover the data by repairing the pcb (replace the burned capacitors)
  • Sacrifice the data and reuse the drive building my own NAS

Most (but not all) of the data is already safely on my file server. I've lost some video but everything else is either duplicated or replaceable so, option 3 is looking favourite! I'm toying with the idea of a low-powered box running FreeNAS or perhaps even a Intel's NUC. I even looked into using a Raspberry Pi!

I've accepted that the data is gone and that I should probably format the drive, but I really can't decide on (or afford) a replacement. I'll mull it over but, in the meanwhile, my advice is to avoid Western Digital drives if you value your data.

Sources & References:

  • None

Tuesday, 3 June 2014

Mint 16: XServer Fails on Live Disk

I've been playing around with an old Fujitsu Siemens Amilo laptop but couldn't get the Mint 16 Live Disk to boot to the live desktop: from the welcome screen I could only get an error message that XServer had failed. The Amilo graphics are listed as VIA/S3G UniChrome Pro IGP which require the OpenChrome video drivers in Ubuntu and its derivatives.

I have managed to get to a low resolution live desktop (using a USB Live Disk) by tweaking some guidance on the Linux Mint Forums:

From the Linux Mint Welcome screen, I selected Start Linux Mint and then hit Tab. The following code appears under the menu:

/casper/vmlinuz noprompt cdrom-detect/try-usb=true persistent file=/cdrom/preseed/linuxmint.seed boot=casper initrd=/casper/initrd.lz quiet splash --

Playing around with the options, I found that replacing the quiet splash -- element with nouveau.modeset=0 gave me the best result: booting without error to the low-res desktop. My code looked thus:

/casper/vmlinuz noprompt cdrom-detect/try-usb=true persistent file=/cdrom/preseed/linuxmint.seed boot=casper initrd=/casper/initrd.lz nouveau.modeset=0

This code isn't persistent so it won't survive a reboot. However, the advice is that the kernel can be amended to make the change permanent after installation: but, as this isn't my system, I haven't tested that advice!

If you receive the XServer error after changing the code, simply restart X at the prompt:

startx

Then check to make sure that you're using the correct amendments for your graphics.

I've been worrying at this for several days and was about to give up so I'm pretty chuffed that I've got it resolved. That said, I'm not sure that the owner will want to go to the trouble of changing the system on hardware that is this ancient - time will tell!

Sources & References:

Sunday, 1 June 2014

Finally, I've Found Something That Doesn't Work!

I've finally found something that I can't make work using Ubuntu (or its derivatives) - my old Canoscan D1250 U2 flatbed scanner. The good news is that I don't need it, I use my HP Photosmart C6280 which probably explains why I've never tried to get this piece of hardware to work before today!

Sources & References:

Sunday, 25 May 2014

Driving Backwards - Fixing Graphics Performance In Mint 16

I've enjoyed playing around with Mint 16, it's particularly nice to have a customizable desktop that you really can make your own. One of my favourite applications of distros past is Cairo Dock - I love the groovy animations and funky sound effects: it's been a real blast having it back! However, I have noticed some problems with the overlay graphics; when a window overlaps the dock, the pop-up menus and icons become washed out and visually pretty horrible.

Fortunately, it's an easy fix to revert to the bundled driver and fix the graphics performance:

From the menu button on your Taskbar, select Administration and then Driver Management - input your password at the authentication dialog.

In the Driver Manager (as superuser) dialog, select the xserver-xorg-video-nouveau option, click Apply changes, & (once the driver has downloaded & installed) reboot.

When you reboot, things should have returned to normal. However, you may see a dialog at startup advising you to turn on OpenGL: check the remember my choice checkbox and select yes.

Sources & References:

  • None

Monday, 12 May 2014

(Another) Ubuntu 14.04LTS Keyboard Fix

Whilst browsing the Lubuntu Blog for installation issues, I came across a known bug in the keyboard layout for some languages (in particular, GB Eng) - reading the bug report suggests that this problem exists across all flavors of the Ubuntu 14.04 distribution.

If my previous suggestion on fixing your keyboard language doesn't work, there are a number of fixes in the bug report. As always, try the simple ones first & in this case, Branimir Butorac's post (26) put me on the right track for my Ubuntu installation on the DELL Inspiron 6400.

Open The settings Menu & select Language Support from the Personal settings. Under the Keyboard input method system, select none.

Reboot to check persistence.

Sources & References:

Sunday, 11 May 2014

DELL 6400 Integrated Card Reader & Ubuntu (sudo v gksu)

I've written on getting the integrated card reader to work on my Inspiron 6400 before. After changing/re-installing my operating system, this is one of those important/non-urgent jobs that gets done when I need to read a memory card (& usually not before!). However, I have noticed that the fix that I posted last July doesn't persist: that is, if I unmount a card, I can't (always) mount another without rebooting my laptop.

There's a good reason for this: I didn't understand that you should never launch a graphical application from the terminal using the sudo command.

"You should never use normal sudo to start graphical applications as Root. You should use gksudo (kdesudo on Kubuntu) to run such programs. gksudo sets HOME=~root, and copies .Xauthority to a tmp directory. This prevents files in your home directory becoming owned by Root. "
[Source]

It seems that when running a graphical application via the sudo command, the application is granted root privilege but utilizes the users configuration file. Therefore, best practise dictates that, when opening graphical applications with administrator privilege, you should invoke the application using the gksu command.

So, I'm compelled to revise my advice for fixing the integrated card reader on the Inspiron 6400. Open a terminal & then:

gksu gedit /etc/modules

Instead of being prompted for your password in the terminal (as you would if you had invoked Gedit using sudo), a administrative dialog will appear requiring your authentication. Enter your password & click OK to open Gedit as root.

When Gedit opens, add the following code to the bottom of the file:

sm_ftl

This is a better solution than the one posted last year but it is not completely effective (delayed unmounts will sometimes result in a return of the problem behaviour). However, maintaining focus on the file manager whilst swapping out cards generally displays fix persistence.

Sources & References:

Tuesday, 29 April 2014

Good Grief - It's Life Jim...

It's early days, but after a shaky start (no sound and corrupt video), I've got 14.04 running nicely on the DELL Dimension 8400. That's a ten year-old machine!

The fact is, I haven't been this psyched about an operating system since Karmic.

More to follow...

Sources & References:

  • None

Friday, 26 July 2013

One Careless Owner

I'm amazed at what some folk will throw out.

I went to the dump recycling centre the other day and found this Compaq C700 sitting in the electronics skip. At the time I was working on a customers CQ71 that some imbecile had removed most of the case screws, so I grabbed this only so I could cannibalize it for parts: I simply assumed that it didn't work.

Anyway, it's been a quiet couple of weeks so I put in an old 2.5" hard drive and turned it on...

...some lights, but not much else seemed to be happening.

Anyway, out of curiosity I plugged in a VGA cable and the monitor fired up without missing a beat! Clearly, the screen was shot (something that seems to happen a lot with Compaq Presarios), but (apart from all the bits I'd robbed) it was good to go.

I bought the parts from ebay and kept the refurbishment second-user: apart from a new screen (grade B) I've had to replace the battery, charger, speakers, caddy, and screws (plus an old 60GB hard drive I had laying around).I put it back together this morning and it fired up first time. All the ports work, the optical drive is fast and quiet, and there's barely a scratch on the case.

If I had some spare money, I'd keep this little beauty but sadly, I need to sell it!

Sources & References:

  • None

Tuesday, 23 July 2013

DELL 6400 Integrated Card Reader & Ubuntu 12.04

My six year old laptop has become my primary machine over the last few months. I've always liked the DELL Inspiron 6400 but it's never been used as much as it should have been - until now!

Unsurprising then that I should only now realize that the integrated card reader doesn't work! I've been meaning to look into it for a couple of days and finally got round to it this evening: the fix took seconds!

Open a terminal and type:

sudo gedit /etc/modules

When Gedit opens, add the following code to the bottom of the file:

sm_ftl

Save and close the modules file and reboot. Inserting a SD card on restart resulted in a welcome media prompt.

I always like the easy fixes!

Sources & References:

Small & Perfectly Formed?

It seems that everyone's at it; making PCs smaller is the order of the day and in August, Compulab will start taking orders for its new micro-computer - the Utilite.

Designed to run Linux & Android operating systems, this isn't a bad looking piece of kit: sadly, it'll probably end up fixed to the rear of a flat panel monitor with some sort of VESA mount! OK, I'm being cynical, but it makes you wonder why they don't just put all this inside the monitor and be done with it: if you want a PC so small that it's all but invisible, you might as well hide it to begin with.

The technical specs aren't too shabby though: top-end, the Utilite boasts a quad core Cortex-A9 MPCore and up to 4GB of DDR3 although the headline price of $99 will only snag you a Freescale i.MX6 single core processor and (I'm guessing) less memory. Ports galore and a low-energy supply it looks versatile and capable of saving the planet from all those 500W electricity guzzlers out there.

Ironically, for such a small product, the market in micro-computers is remarkably crowded and users are almost spoiled for choice. Take your pick from the Raspberry Pi, Intel's NUC, Gigabyte's BRIX, or a thousand handsets running Android, IOS, Windows, and (hopefully) Ubuntu.

Sources & References:

Sunday, 21 July 2013

Win98 Custom Build - Specs

Last month I blogged about installing Win98 using Virtualbox on Precise, so, for completeness, I thought I'd post the spec and a couple of pics.

Bear in mind that the primary role of this build is to run Win98; it's designed as a business machine and not a gaming rig! That said, it's running the 64-bit version of Ubuntu Precise and the UEFI is tweaked for virtualization.

  • Chassis - Xigmatek Asgard II
  • CPU - Intel Pentium G620 2.6GHz Dual-Core
  • Mobo - Gigabyte GA-Z77-DS3H ATX LGA1155
  • Memory - G.Skill 4GB (2 x 2GB) DDR3-1333
  • PSU - OCZ CoreXStream 500W
  • Wireless Card - TP-Link TL-WDN4800
  • Optical Drive - LG GH24NS95 DVD/CD Writer
  • Card Reader - Icy Box IB-864 Front Panel 3.5"
  • Operating System - Ubuntu 12.04 Precise 64-bit
  • Virtualization - VirtualBox

The case doesn't attract particulary good reviews (either on Amazon or PCPartPicker) but I really liked it. Cable management is actually easier than some of the reviews suggest but it does require some forethought. If I have a criticism, it's that the tool-less system doesn't hold the drives square in the drive bays. Adding a securing screw on the I/O side of the case helps, but this does defeat the object!

The PSU is virtually silent and is seriously over-powered for the designed purpose (more than twice the estimated power requirement!). However, it was on offer at the time of the build and it does add some future-proofing to the build - highly recommended!

The card reader required a header adapter (the USB3.0 internal connection is a standard usb connector). The adapter is a little loose in the header, but the connection appears sound enough and the system did survive the journey from workshop to customer.

Sources & References:

Saturday, 29 June 2013

D-Link's Impressive Powerline

I know that these devices aren't new, but I've never used them before today: D-Link's Powerline network adapters are superb and a great way to extend your network to those hard-to-reach WiFi spots.

Setup time is minimal (around ten minutes with all the plug & sorting and cable untangling!) and connecting your PC to the network gives new meaning to the phrase plug 'n' play. All-in-all I'm very impressed.

Just one word of warning: the RJ45 cables supplied in the starter kit are around 450mm long (around 18") and nowhere near long enough for any practical purposes. Make sure that you've got a couple of spares handy or buy some when you order your starter kit.

Sources & References:

Thursday, 13 June 2013

Back to the Future - Ubuntu & Win98

One of the nice things about starting your own IT support business is meeting fascinating people who have interesting or unusual requirements: recently, I've been helping a customer to install Win98 on modern hardware, not as straightforward as it sounds!

Although rare, it's not unheard of for people to be running legacy systems in the UK: I know of several companies that use Win98 on closed networks to run machinery and many of them are finding it increasingly difficult to maintain the hardware. Nonetheless, developing bespoke software to run on Win7 or Win8 still makes migration to newer equipment financially unappealing when compared to nursing archaic computer equipment.

"OK", I hear you say, "but what's this got to do with Ubuntu?" Well, although I did manage to get Win98 installed and stable on the XP machine, getting it to communicate with peripherals (such as the dot-matrix printer and a floppy drive!) proved beyond me: it just didn't want to play. Clearly, this was of no use to my customer who then started to make plans to import a machine from the US specifically to run a fifteen year old operating system. It's then that we started discussing the option of virtualizing Win98 on an open-source operating system using one of the freely (and free!) available virtualization programs.

Installing Precise on the WinXP box was easy and the processor had no problem driving VirtualBox. Fortunately, my customer was using WinXP SE (by all accounts, much easier to get running on VirtualBox than the previous version), so getting Win98 running was also simple but we still had several issues to resolve.

The first is purely aesthetic: in VirtualBox, Win98 SE only runs in a low resolution mode (800x600 16 Color). We fixed this using a very useful utility called SciTech Display Doctor. This is no longer supported, but you can find a registration code online that allows you to use the utility beyond its trial period.

Secondly, we had to fix the ACPI idle time issue (see here for an explanation) - we did this using a utility called Rain which, ordinarily, is used to keep over-clocked processors operating at peak efficiency.

Getting the printer to work was no more difficult than using a IEEE 1284 usb-centronics converter. This didn't work out of the box and we needed to hunt down some drivers. Contrary to some of the reviews on Amazon, our cable had no driver disk (for 98 or otherwise). However, by effectively converting our printer to a USB device, all we then had to do was install the VirtualBox extension pack to enable USB support in Win98 and install a brilliant (and still supported!) utility called DOSPRN.

This approach also worked for a USB floppy drive (without the need for DOSPRN), but with USB support, we no longer needed the restricted format of floppy disks: usb thumb drives are completely supported in this setup and the larger capacities are infinitely preferable to 1.44MB of storage!

On the customer's WinXP box, this setup worked - just! However, replicating it on my WinVista machine was much more successful. Having a dual core processor with plenty of spare system memory clearly helps! So, we'll build a bespoke system to host this virtualization and make the whole enterprise a little more future proof. Of course, the host operating system will be Ubuntu Precise, saving the customer a few bob on a Windows installation ;).

Sources & References:

Monday, 20 May 2013

Reliable? Yes!

Last month I reported on the installation of a TP-Link TL-WN751ND wireless adapter in my mongrel 12.04 workshop setup. There's no doubt that it was a serviceable if not perfect solution to my telephone installation problems. Although I continued to experience the connection drop-outs during the period they were less frequent than with my Belkin dongle and, in defence of the card, it has provided (significantly) faster speeds.

Now that I've got my own broadband, I've had a few days to test the card on a dedicated network. Since the installation of my service, the card hasn't dropped the connection at all, so my problems on the public network were probably related to signal strength and user activity (that is, the network, not detecting any user activity, dropped the connection automatically) issues. Surprisingly, the reported speed on the private network has dropped to 65Mb/s. I say surprisingly because the wireless AP is directly above the antenna, separated from the PC by only a wooden desktop.

Nonetheless, I've decided to leave the PC on a wireless connection for now. Sure, it's probably not as fast as a physical Ethernet connection, but it is reliable and it saves using up a port on the router. If you buy sensibly (which I did not), this card offers a reliable wireless connection and I find myself recommending its use on Ubuntu machines.

Sources & References:

Tuesday, 30 April 2013

The Reliable Drive & The Missing Windows

I started my journey into open-source in 2008 after the hard drive in my Windows XP machine died. Little did I know at the time that pursuing my interest in Linux would ultimately lead me to a career in IT! Nonetheless, here I sit in my workshop waiting for the telephone installation and marketing materials before I can make my first million.

Whilst sorting through some bits and pieces that I thought might come in useful for my new venture, I stumbled across that old hard drive and found myself wondering whether I could salvage any of the data. I confess that I thought it unlikely, I was certain that the drive had suffered a physical failure and wouldn't even spin up, but I thought trying might make for an interesting diversion while waiting for suppliers and customers (not necessarily in that order). Imagine my surprise then when I plugged it into my workshop pc and Ubuntu recognized it instantly.

However, whilst I could see the drive in Nautilus, I couldn't mount the file system; Ubuntu complained that Windows had not shut down properly and was corrupt. Nonetheless, a promising start!

I put the XP installation disk into the optical drive and selected the repair option from the menu. In XP, this option drops you to a command line; something Microsoft calls the Recovery Console1. From here I tried:

  1. fixmbr
  2. fixboot
with no success.

Following advice from the Ubuntu error message, I then tried chkdsk /f. Chkdsk is a utility which checks the status of the disk for errors and the f switch attempts to repair any problems the utility finds. However, although the utility ran, it failed with errors after a couple of hours and I still couldn't access any data. A second attempt also failed.

It was then that I recalled a vague reference to problems with chkdsk running on an XP SP2 installation using and XP SP1 installation disk (sorry, I can't find the reference now). My original installation was an OEM install by DELL, an XP Professional SP1a OS. Fortunately, my laptop came with XP Professional SP2, so I thought I'd give the installation disk a try.

It took several hours, but chkdsk reported that it had fixed errors on the disk. I tried booting to XP but it hung on the splash screen and, as yet, I've not been able to boot from the disk. But, I can access all of the files from Ubuntu! I've found several photographs that weren't included in my backups and that I'd thought had gone forever, so I'm pretty chuffed.

The question now is what to do with the disk. Clearly, the drive must be returned to the original PC if I'm to run XP and I can still try:

  • fixmbr
  • copy d:\i386\ntldr
  • copy d:\i386\ntdetect.com
  • bootcfg /rebuild
if I want to get XP running, but my Dimension 8400 has been running Ubuntu for five years; why would I want to regress to XP? The fact is that I achieved what I set out to achieve: access to data I thought lost.

The irony is that, had I not simply replaced my PC when the original XP installation failed, I might never have investigated Linux.

Sources & References:

Notes

  1. See Meyers 2012 pp.820-823