Showing posts with label Terminal. Show all posts

Saturday, 1 November 2014

Quick Tip - Auto Shutdown

I'm currently copying some video files to my network drive so that I can stream them through the house. It's a time consuming business so it makes sense to batch some up to copy overnight. However, being tight, I hate the idea that the system will be idle for hours after the task is finished, needlessly consuming power. The solution is simple; tell the system to shutdown automatically at a set time.

Estimate your shutdown time and open a terminal:

sudo shutdown -h hh:mm

where hh:mm is the time (in 24 hour format). So, to close my system at 03:00am:

sudo shutdown -h 03:00

I type in my password, turn of my monitor (and any other peripherals) and go to bed!

Sources & References:

  • None

Sunday, 15 June 2014

Quick Tip - List Applications

You can view a list of installed applications using the terminal - this works in Ubuntu 14.04 & Mint 16. Open a terminal and type:

dpkg --get-selections

If you want to export the output to a file:

dpkg --get-selections > /home/[user]/Documents/app_list.txt

Change [user] to suit your circumstances.

This will place a text file in your Documents folder called, app_list.txt. Double click to open from your file manager.

Sources & References:

  • None

Saturday, 10 May 2014

ufw - Letting Samba Play

In yesterday's post on security I mentioned that, if you share files on your network using Samba, you'll have to add some special rules to your firewall. Fear not, this is pretty easy!

Open a terminal and type the following commands pressing enter after each one.

sudo ufw allow proto udp from 192.168.1.0/24 to any port 137

sudo ufw allow proto udp from 192.168.1.0/24 to any port 138

sudo ufw allow proto tcp from 192.168.1.0/24 to any port 139

sudo ufw allow proto tcp from 192.168.1.0/24 to any port 445

You may not have the same address as the one used in the example code above - you can check your own ip address in your terminal (in Linux) using:

ifconfig -a

Find your (live) network connection from the list and identify the inet addr data and amend the above rules accordingly. As you add each new rule, the terminal will confirm that it has been added successfully. However, you can check the status of your firewall once all of the rules have been added with:

sudo ufw status

If all's gone well, you should see something like the screen below:

Remember, to access folders and files you'll need a Samba password on the server (you'll be prompted for your username & password when you try to access the files through your file manager). You can add a user and password from the terminal:

sudo smbpasswd -a [username]

Change [username] to suit your circumstances. You'll be prompted for you root password (if you're not already operating at elevated permissions) and then for a SMB password - this is the password that you'll use to access files from a client computer. Confirm your SMB password when prompted.

Reboot and you should be able to access files from a remote client. Remember, you will have to open these ports on any pc with ufw enabled if you want to share folders and files using Samba.

Sources & References:

Friday, 9 May 2014

So, 'Nix is Safe, Right?

There's always been a lot of debate about how safe Linux is from virus and hacking attacks: inevitably the discussion is distilled to a simplistic comparison between the distribution in question & Windows, but I usually find these comparisons to be unhelpful.

There's a lot of reasons that Windows is more susceptible to attack, not least it dominates the PC market, giving attackers a larger pool of potential victims. Moreover, viruses for 'nix are unheard of in the wild but, before we Linux users get too smug, that doesn't mean that we're impervious to attack! The reality is that all operating systems are vulnerable to some extent and vigilance is always recommended whatever system you choose.

The good news is that there are some very simple steps that new users can take in order to mitigate their exposure to attack. The first, and probably most important, is to choose a strong password. This mitigates the chance that an attacker can guess your password or use a dictionary attack to gain access to your system.

Another important action is to enable the bundled firewall, ufw. The firewall is not enabled by default in Ubuntu or its derivatives but it's easy to enable and, for most users, can be run using default settings1. Open a terminal & then:

sudo ufw enable

Provide your password at the prompt and hit enter. To check your firewall status, at the terminal prompt, type:

sudo ufw status

If all's gone well, you should see the output:

status: active

You may also see some additional rules (but only if you've customized your firewall).

Finally, don't forget to install security updates as soon as they become available: these patch your system and close vulnerabilities that attackers might exploit.

Ultimately, security relies on the user, but these simple tips can help keep your system (and your data) secure.

Sources & References:

Notes:

    1 If you share files across a network, you'll need to add some firewall rules: more about that in another post but I've referenced guidance in the sources section.

Friday, 2 May 2014

14.04 Replacing LibreOffice With OpenOffice

Recently I was asked to replace the bundled LibreOffice with OpenOffice on a vanilla install of Ubuntu 14.04. It's kind of tricky because you have to remove everything connected with LibreOffice before OpenOffice will install.

First, uninstall LibreOffice. I tried several methods but, in the end, the following was the only one that worked. Open a terminal (Ctrl+Alt+T) & type:

sudo apt-get remove --purge libreoffice*.*

Download OpenOffice into your Downloads folder and then right-click on your download and click Extract Here. The resultant directory (/home/usr/Downloads/en-GB)* contains a sub-directory called, DEBS - change to this directory using the terminal:

cd /home/usr/Downloads/en-GB/DEBS

Now do:

sudo dpkg -i *.deb

Not quite finished: we need to integrate OpenOffice into the Ubuntu desktop. Change directory to the ./DEBS/desktop-integration folder:

cd ./desktop-integration

Now run the dpkg instruction again:

sudo dpkg -i *.deb

Now, exit the terminal and you should find OpenOffice in the dash.

Sources & References:

Notes:

  1. * Where usr is your user name & en-GB is your installation file after extraction.

Thursday, 1 May 2014

14.04 Keyboard Conundrum Continued...

One little problem that has popped up since my upgrade to 14.04 is that the keyboard, despite being set to English UK, layout is not reflected in the keystrokes. This can be irritating when you press the hash (#) key and get a forward slash (/) symbol.

Fortunately, I've come across this problem before and the fix is satisfyingly easy! Open a terminal (Ctrl+Alt+T) and type:

sudo setkeycodes 91 100

Done!

Sources & References:

Sunday, 27 April 2014

Chromium Flash Player in 14.04 LTS

If, like me, you're not a big fan of Firefox, you may prefer an alternative browser - I like Chromium, but in 14.04 flash player is not enabled by default. In 14.04 the fix is fairly straight forward, in a terminal, copy & paste:

sudo apt-get install pepperflashplugin-nonfree

Followed by:

sudo update-pepperflashplugin-nonfree --install

If restarting your browser doesn't enable flash video, rebooting my PC worked for me.

Sources & References:

Wednesday, 19 June 2013

Fixing Grub

After resurecting my old WinXP drive recently, the GRUB menu appears during the startup routine on my workshop machine. It's probably because two operating systems are detected during the boot sequence but as I never intend to use WinXP on this machine, this behaviour is a little irritating - fortunately, it's easy to fix!

From a terminal (Ctr+Alt+T), open your grub file:

sudo gedit /etc/default/grub

Input your password when prompted and make the following changes:

  1. Un-comment line 2 #GRUB_HIDDEN_TIMEOUT=0
  2. Change line 3 from: GRUB_HIDDEN_TIMEOUT_QUIET=FALSE to read: GRUB_HIDDEN_TIMEOUT_QUIET=TRUE
  3. Amend line 4 to read: GRUB_TIMEOUT=0

The relevant part of the amended file should look similar to this:

GRUB_DEFAULT=0
GRUB_HIDDEN_TIMEOUT=0
GRUB_HIDDEN_TIMEOUT_QUIET=true
GRUB_TIMEOUT=0
GRUB_DISTRIBUTOR=`lsb_release -i -s 2> /dev/null || echo Debian`
GRUB_CMDLINE_LINUX_DEFAULT="quiet splash"
GRUB_CMDLINE_LINUX=""

Save and close the file and then update grub:

sudo update-grub

Reboot:

sudo shutdown -r now

Sources: & References:

Friday, 13 July 2012

Turn Off, Switch On!


It matters not how good No-IP's service might be (and it is good) if you don't think before you act. This week I had to attentd to an urgent matter that required access to files on my server: no problem I thought, I can access them from work (during my lunch break, of course!) using NoMachine.

Except I couldn't!

It took several hours of racking my brain to figure out why my IP address hadn't been updated by the No-IP client before I realized that it wasn't updating the DDNS server because it wasn't running! I'd rebooted my server after a software update and had never restarted the client. Clearly, if you are as absent minded (read, stupid) as I, it's better to start the client automatically every time the pc boots and, fortunately, this is easy to achieve.

Open a terminal and login as root:

sudo -i

Then add the client to the startup file (/etc/rc.local):

echo '/usr/local/bin/noip2' >> /etc/rc.local

Remember to exit from root & the terminal by typing exit twice:

exit

exit

In my defence, I had implemented a fail-safe using email and file copies, so all was not lost. More to the point, I was actually pretty chuffed that I'd figured out the problem without resorting to Google, so all-in-all the episode was far from a disaster.

Sources & References:

Thursday, 5 July 2012

Static IP with No-IP


One minor problem that I've experienced with my new server set-up is random changes in my IP address. Ordinarily, I would expect my IP address to stay fixed for as long as my router remained up and connected to the WAN, but short interruptions at the exchange have renewed my IP address on several occasions meaning that I couldn't connect to my network using NoMachine. My new ISP doesn't offer static IP addresses to domestic customers (no surprise there), but I have found a way to achieve the same result using a dynamic IP address.

No-IP is a service that uses a client to update and redirect service to map a static (DNS) or dynamic (DDNS) IP address to an easy to remember subdomain. The good news is that, when my exchange renews my IP address, I don't need to worry any more, I just point No-Machine to my server's new subdomain. Even better, the entry level service is free! The bad news is that the installation instructions for Ubuntu 12.04 out there on the Internet are not as accurate as they could be and I found installation a little tricky. So, here's how I did it!

Firstly you have to sign up for your No-IP account and set-up your host in the Account section - you'll need to know your current IP address for this. The process for setting up your host is pretty straightforward, so I won't replicate it here.

Next is to install the client on your server: don't bother with the sudo apt-get install option to download the No-IP client (suggested on the No-IP site), it doesn't work! Go to the downloads page, click on the penguin and save the file to the location of choice (mine was home/jogga/Downloads/). When the client has downloaded, use Nautilus to navigate to the download directory, right-click the noip-duc-linux.tar.gz file, and select the Open With Archive Manager option. Click Extract.

Now open a terminal and change directory to your extracted file:

cd /home/jogga/Downloads/noip-2.1.9-1

Tip: keep an eye on your folder/version number - mine is 2.1.9-1; yours could be different.

Now issue the make command.

sudo make

Now issue the make install command.

sudo make install

You'll be prompted for your login details and password. Leave the update interval to 30 (unless you have a good reason to change it) and check that the correct nic is selected (probably eth0).

To check that the client is running:

/usr/local/bin/noip2 -S

If not:

/usr/local/bin/noip2

That's it!

Sources & References:

Saturday, 10 September 2011

Quick Tip - Kubuntu Muted System Sounds

If you've installed Kubuntu and find that you have no system sounds, open a terminal and type:

alsamixer

When you've hit the Enter key, the control panel for your sound card will appear in the terminal window.

Make sure that the Master & PCM volume levels are not set to zero by using the left/right arrow keys to select the playback type and the up/down arrow keys to set the levels.

F4 will give you access to the Capture (input) levels and F5 will display both input & output levels. Hitting the Esc key returns you to the command prompt.

Sources & References:

  • None

Wednesday, 31 August 2011

ttf-mscorefonts-installer Package - Don't be Fooled!

So, you think that by installing the ttf-mscorefonts-installer package via KPackageKit that you now have access to the Microsoft fonts? Well, if you have installed the package via the software manager, it's worth checking that it's been properly installed!

To check, open a terminal and type:

locate Arial

If you return to your command prompt without listing any files or directories, the package hasn't been installed even though KPackageKit lists it as an installed package. This may be the result of a bug in KPackageKit that prevents the user from accessing (or, even seeing) the End User Licence (EUL) Agreement.

There are a couple of ways of fixing this, but I found the easiest was to purge the existing package (using the terminal):

sudo apt-get purge ttf-mscorefonts-installer

And then reinstall the package (again, using the terminal rather than KPackageKit):

sudo apt-get install ttf-mscorefonts-installer

Now the Microsoft EUL Agreement screen should appear:

  • Hit TAB to highlight the < OK > option in the EUL Agreement screen and press Enter.
  • Select < Yes > in the next (Configuring ttf-mscorefonts-installer) screen.

  • When the package has finished installing (you return to your command prompt), force the cache to reload:

    sudo fc-cache -f -v

  • Now check that your fonts are installed:

    locate Arial

Now you should be able to select the fonts for use in the System Settings and application properties dialogs.

Sources & references:

  • None

Saturday, 27 August 2011

Quick Tip - Finding Your Linux Version Information

If you ever need information on your Linux release, open a terminal and type:

lsb_release -a

My output (on my Kubuntu machine) looks like this:

No LSB modules are available.
Distributor ID: Ubuntu
Description: Ubuntu 10.04.3 LTS
Release: 10.04
Codename: lucid

Sources & References:

Friday, 12 August 2011

EncFS - Changing Passwords

If you've created an encrypted directory using EncFS, it's likely that at some point you'll want to change your password - this is a painless process using the command line.

From a terminal, type:

encfsctl passwd /path/rootdir

Where /path/rootdir is the path to the directory that stores the encrypted data (This is not the mount point directory - the root directory address will likely begin with a period - for example: /home/jogga/.rootdir).

You'll be prompted for your current password and then your new password. Once you have verified the new password successfully, you'll see the following confirmation message:

Volume Key successfully updated.

Sources & References:

Sunday, 7 August 2011

Deleting Directories Securely

The shred command is a great way of deleting individual files securely, but it can be a bit cumbersome if you have a lot of files that you want to delete at once. Fortunately, there is a secure method of deleting whole directories in Linux using the command line and a package called (appropriately enough), secure-delete.

You can install secure-delete from the Ubuntu Software Centre or the Synaptic Package Manager. The package contains tools to delete files & directories (srm), clean the swap memory (sswap), and clean the RAM (smem) - all of these tools are accessed via a terminal.

To delete a whole directory, open a terminal and type:

srm -r -v /path/to/directory

The -r option makes the process recursive (it deletes all sub-directories - so be careful!) and the -v option provides verbose output in the terminal window during the operation.

Clearly, this can save you a lot of time (and typing), but, as with all things Linux, there is an implicit assumption that you know what you are doing - once you have shredded files & directories using these tools, they cannot be retrieved.

Sources & References:

Sunday, 24 July 2011

Fontconfig Error

I've finally got around to solving a puzzle in the terminal on my 8400. Whenever I opened an xml file for editing using the command line, I would get the following error message:

"~/.fonts.conf", lne 1: xml declaration not well-formed

As it's never stopped me from working, I've never really paid much attention to the message, but, as I had some time to spare today, I thought I'd see if I could work out what the it was telling me. Actually, it turned out that getting rid of this irritating error message was quite simple.

Opening the ~/.fonts.conf file from the command line (& receiving the usual error!):

sudo gedit /home/jogga/.fonts.conf

revealed that the quotation marks that define the variables in the file were of the wrong type - simply changing the double quotation marks (by deleting the existing marks and replacing them using the Shift + 2 keys) and rebooting the system was all that was required!

Sources & References:

Monday, 4 July 2011

Deleting Files Securely.

It's no secret that deleting files from a directory doesn't actually erase the files from a hard-drive: it simply marks the disk space as writeable (or empty) and removes any links to the file from the file-tree. For most purposes this is sufficient, but what about those sensitive bank account records and other files that you'd rather not leave hanging around?

Fortunately, Ubuntu ships with the GNU core utilities package which contains the shred command to overwrite a file and effectively destroy its data1.

Let's say that you have a text file called test.txt in the your /home/USR_Name directory that you want to obliterate. Open a terminal and type:

$ shred -u -z -v -n [N] /home/[USR_NAME]/test.txt

Where:
-uTruncates & removes the file after overwriting.
-zAdds a final overwrite with zeros to obscure the shredding process.
-vShows the progress (verbose output) of the operation in the terminal window.
-nThe number [N] of iterations instead of the default.

So, to shred the test.txt file from my /home/[USR_NAME] directory with 30 iterations:

$ shred -u -z -v -n 30 /home/jogga/test.txt

The command can manage multiple files and wildcards. For instance, if you want to delete all .jpg files in a directory; change to the directory (cd /home/[USR_NAME]/directory) and type:

$ shred -u -z -v -n [N] ./*.jpg

However, you should exercise caution when destroying multiple files (or, in fact, when destroying individual files)!

Sources & References:

Notes:

1 There are limitations to this claim: some file systems negate the efficacy of the shred command and you should read the man page to ensure that this form of data obliteration meets your needs. In Ubuntu, the ext3 file system is particularly problematic.

Monday, 16 May 2011

LifeCam VX-1000 on Ubuntu 10.04

Please note that not all of the steps outlined in this post may be necessary to get your VX-1000 working with Lucid - you might find that all you need to do is install Jef Moine's gspca patch! I don't know who Jef Moine is and I have no idea about what the patch will do to your system; but, I do know that it worked for me. I recommend reading all of this post before deciding whether you need to follow each step.
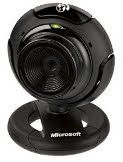
The VX-1000 LifeCam
After several attempts to get my VX-1000 Microsoft LifeCam working with the various Ubuntu releases, I'd almost given up hope of successfully integrating the hardware with my desktop: inevitably, Ubuntu could see the device (type lsusb into a terminal), but sound and video stubbornly refused to co-operate. I assumed that I would never been able to get it to work with Ubuntu and I'd even started to consider alternatives - Then I plugged it into 10.04!.

Doubtless, I've made the process of getting this over-priced/under-performing hardware to work with Ubuntu more difficult than necessary, but now the camera works with Cheese and I can use it for both video and sound calls with Skype. That's the good news: the bad news is that the picture quality is pretty rubbish!

Actually, getting the video to work in Skype is fairly straightforward. Make sure that the camera is plugged in and then open a terminal and type:

LD_PRELOAD=/usr/lib/libv4l/v4l1compat.so skype

However, I experienced two problems with this approach:
  1. After closing Skype or rebooting the computer, the video no longer worked. This seems to be because the standard command in the startup applications entry is simply, skype and no amount of editing in the Startup Applications' Preferences dialog would force the v4l application to load.
  2. The built-in microphone didn't work.
I rectified the first problem by removing the standard Skype entry from the Startup Applications' Preferences menu (Preferences > Startup Applications' Preferences & unchecked the Skype option) and then created a new shell script and adding that to the startup routine. Using Scite (any text editor should suffice), I created the new script thus:

#!/bin/bash
# Start Skype with video enabled
LD_PRELOAD=/usr/lib/libv4l/v4l1compat.so skype

I saved the file in my /home directory as skype.sh and then made it executable:

chmod +x /home/jogga/skype.sh

(For obvious reasons, if you are following these instructions, change your username to suit!) Then I added this script to the startup applications by clicking Add in the Startup Applications' Preferences dialog.

skype.sh
Adding the Skype script to the Startup Applications List

This approach does seem to lengthen the boot time but it does work.

To get the sound to work I installed Jef Moine's latest gspca patch. The patch works for a broad range of webcams and you can find a list of supported devices here.
  1. Download the gspca-2.12.25.tar.gz patch to your Downloads directory (or any convenient location).
  2. Right-click the package and select the Extract Here option (or use Archive Manager to extract the package to your location of choice).
  3. Open a terminal and change to the gspca-2.12.25 directory - in my case:

    cd /home/jogga/Downloads/gspca-2.12.25

    but you should amend the command to suit your own username and directory location.
  4. If you want to install the whole package (i.e. support for all the webcams), type:

    make

    However, it is possible to install only the driver required to make your camera work. For instance, to support the VX-1000, type:

    make gspca_sonixj.ko

    You can identify the required driver using the gspca Supported Webcams documentation.
  5. Then, install the driver:

    sudo make install

  6. Reboot your computer and test your webcam's microphone by making a Skype test call.
If the microphone is still not working, you may need to change the input device in the Sound dialog (Preferences > Sound > Input).

So, this is another piece of hardware that will see a more use thanks to a little perseverance and a lot of effort by the Ubuntu Community.

Sources & References:
Jef Moine: Jef's Page
Gnome Projects: Cheese Home Page
Kernel.org gspca Supported Webcams

Saturday, 30 April 2011

Errant Apps

If you ever experience problems starting an application from its menu icon, you may be able to diagnose the problem by starting the program from the command line. However, with so much software, it's not always easy to remember the command used to invoke any particular program: fortunately, you don't have to remember!

From the Preferences menu (System > Preferences) select Main Menu.

Then click the Properties button.

Copy and paste the text in the Command box into a terminal and press Enter.

This should invoke the application and any errors or problems will be recorded in the terminal window.

Monday, 14 March 2011

Ding!

Adding an audible message alert to your Thunderbird mail client is easy if you can find a sound that you can live with! In Thunderbird, just go to Edit > Preferences and then click the General tab.


I prefer simple and unobtrusive notifications (if such notifications don't defeat their own purpose!) and found just what I was looking for in the Ubuntu sound files (have a look in: /usr/share/sound/ubuntu/stereo). The problem was that the file was an .ogg format and Thunderbird prefers its noise in .wav files. Fortunately it's easy to fix audio file formats using FFmpeg.

If you don't have FFmpeg on your system, open a terminal and type:

sudo apt-get install ffmpeg

Then, type:

ffmpeg -i /input_file.ext /outputfile.ext

For instance, I wanted to change the message-new-instant.ogg sound file to a .wav format, change the file name to "mail", and save the converted file somewhere convenient. My code looked like this:

ffmpeg -i /usr/share/sound/ubuntu/stereo/message-new-instant.ogg /home/jogga/Documents/Sound/mail.wav

Note that my destination directory had been created prior to executing the command.

Now that the file has been converted, use the preferences browse button in Thunderbird to select your new .wav file and you should be notified whenever you get mail.

Sources & References:
FFmpeg Home Page