Now that you've checked your installation disk for errors, it's time to install Linux Mint 16.
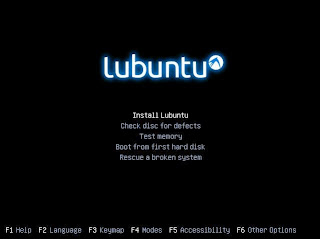
If it's not already in the drive, insert your installation disc and reboot your pc. Make sure that you have set your pc to boot from the optical drive before booting from the hard drive. As you did when checking the disc, you'll boot to the Lubuntu splash screen
Highlight the Install Lubuntu option & hit Enter.
You'll be prompted for your installation language: if your default language is not already highlighted, use the tab, space, & enter keys to find and select your preferred option.
Do the same to select your location on the following screen.
The next screen provides an opportunity to detect your keyboard layout: if you choose not to auto-detect your keyboard, you can change it in the following screen or after the installation is complete. Just Enter on the No option (highlighted).
Select your keyboard from the Configure Keyboard screen and hit Enter. The next screen will provide additional granularity to your input options.
Now the system will detect your hardware and prepare for the installation proper. Time for a cuppa!
After some time preparing the hardware, the installation will require some user input in order to authenticate the system and the user on any network. The first screen requires a hostname for the network. Most of us can just make something up here or go with the default setting. All that matters is that you can identify this machine on your network - so give it something obvious! Use the Tab button to highlight the Continue option and hit Enter
Next comes the user name and credentials. Full name & username do not have to be the same! You'll also be prompted for a password. Once the user information has been verified, you'll be prompted to decide on whether you want to encrypt your /home directory. For the sake of brevity, I'll select the No option: but you may want to consider this option carefully.
Confirm your time zone - the default should be correct.
Now we get into the more technical aspect of the installation - partitioning. I'm a big fan of partitioned drives and usually have a separate partition for my /home directory. However, as this is a test machine (and this tutorial is aimed at XP users) I'll opt for the Guided - use entire disk option.
There's the obligatory warnings (yes, two chances to say "no") of dire consequences of erasing your disc - be sure that you want to continue before hitting the Enter button. On the second screen, you'll have to select the Yes option before hitting Enter.
Now sit back and relax - your system is being installed!
If you need to establish proxy access to the Internet, the next screen will give you the option to add you details (obviously, I can't help with this!). Most of us can just carry on with the installation.
If you're overwriting an existing operating system or writing to a new drive you should select yes to the warning about the GRUB boot loader and then accept the default for UTC time.
Now you're done - remove the Live CD and reboot!
Sources & References:
- None


No comments:
Post a Comment