Wednesday, 31 December 2014

Happy 2015

Well, 2015 is almost upon us and I'd like to wish my reader a Happy New Year!

Actually, I'm being a little hard on myself: Karmic Odyssey gets read by people from all over the world and has had over fifteen thousand page loads over the last five years: not earth shattering I know, but I hope that at least some of what readers found here was useful.

As for the new year, the HTPC will be my next project - cash be damned! I'm also hoping that the Ubuntu phone really will make an appearance in February. Whatever you find yourself doing and wherever life takes you in 2015, I hope that the World will be kind to you and that you have a happy and prosperous time.

See you all on the other side :)

Sources & References:

  • None

Wednesday, 24 December 2014

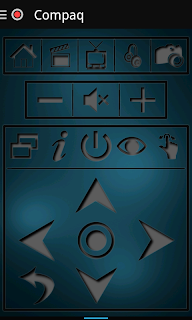
Setting Up the XBMC Remote On Your Android Smartphone

In my post describing how to set up a Yatse remote on your Android smartphone, I opined that the Kodi/XBMC offering was a little trickier to set up. Nonetheless, I've found persevering with the setup to be a worthwhile experience and, despite some minor shortcomings, I've found that the XBMC remote is more reliable on my Samsung Galaxy Advance than Yatse.

In order to control Kodi/XBMC via any remote control, you must first make some adjustments to the host machine. The following instructions are taken from my setup using 13.2 Gotham & my Samsung Galaxy Advance (as the remote):

  1. Start Kodi/XBMC, navigate to SYSTEM and select Services
  2. Select the Webserver menu option:
    • Check the Allow control of XBMC via HTTP option
    • Set the - Port option to 8080 (this should be the default value)
    • The - Username & - Password options can be set to any value you choose (but you'll need to remember them)
    • Leave the - Web interface option as default.
  3. Select the Remote Control menu option:
    • Check the Allow programs on this system to control XBMC option
    • Check the Allow programs on other systems to control XBMC option
  4. Select the Zeroconf menu item and check the Announce these services to other systems via Zeroconf option.

Now we need to allow the remote control access to Kodi/XBMC (via HTTP) via the firewall (because you do have it enabled, don't you!). Both Yatse & the XBMC remote controls are web-based controls; that is, they send their commands via the local area network to the PC hosting Kodi/XBMC (as opposed to an IR or bluetooth remote). Open a terminal and do:

sudo ufw allow proto tcp from 192.168.1.0/24 to any port 8080 && sudo ufw allow proto udp from 192.168.1.0/24 to any port 9777

This is really two commands rolled into one. If you prefer, you can do each separately:

sudo ufw allow proto tcp from 192.168.1.0/24 to any port 8080

Followed by:

sudo ufw allow proto udp from 192.168.1.0/24 to any port 9777

Note, that you may need to change your IP range depending on your hardware. You can check that your firewall has updated its rules using:

sudo ufw status

And then restart your firewall (perhaps not entirely necessary) using:

sudo ufw reload

Now we can set up the remote! If you haven't already, download the XBMC remote from the Google Playstore.

  1. Start the XBMC remote app on your Android smartphone.
  2. From the app home screen, tap your phone's menu button and select Settings
  3. Tap Manage XBMC Hosts.
  4. Tap your phone's menu button and select Add Host.
  5. In the Add new host dialog:
    • Name of this instance: - anything that will identify your host. XBMC can manage multiple hosts, so this is simply a name that tells you which host you are connecting to.
    • Host or IP address: - I had no joy using host names - use your IP address. If you don't want to use ifconfig (from the terminal), from the Kodi/XMBC home screen select the System info sub-menu option from the System option and look under the Summary option.
    • HTTP API port: - leave this as the default 8080 (unless you've changed it for some reason)
    • Username: - You set this earlier (I did tell you to remember it!)
    • Password: - this is the password that you set for Kodi/XBMC and not your host password.
    • EventServer port: - leave as the default 9777 value (unless you've changed it for some reason
    • Leave all other settings at their default values and tap OK
  6. Tap your smartphone's back button
  7. Tap your smartphone's back button (yes, for a second time)

You should be able to connect to your host by tapping the smartphone's menu button & selecting Switch XBMC or from the right-hand applet on the XBMC remote's home screen.

On balance, I like the reliability and stability of the XBMC remote over Yatse, but Yatse is more configurable and looks great. In the end, this is a matter of user choice, but XBMC is free and there are no paid for upgrades.

Sources & References:

Wednesday, 17 December 2014

Jogga's HTPC

Intended design of the HTPC (when I've saved enough money :)

Parts List

  1. CPU: AMD A6-5400K 3.6GHz Dual-Core Processor (£39.99 @ Amazon UK)
  2. Motherboard: ASRock FM2A88M-HD+ Micro ATX FM2+ Motherboard (£46.80 @ Amazon UK)
  3. Memory: G.Skill Ripjaws Series 4GB (2 x 2GB) DDR3-1333 Memory (£35.17 @ Amazon UK)
  4. Storage (Operating System & files): Kingston SSDNow V300 Series 60GB 2.5" Solid State Drive (£32.90 @ Amazon UK)
  5. Storage (Media): Western Digital WD Green 2TB 3.5" 5400RPM Internal Hard Drive (£59.90 @ Amazon UK)
  6. Case: Fractal Design Core 1100 MicroATX Mini Tower Case (£29.99 @ Amazon UK)
  7. Power Supply: Corsair Builder 500W 80+ Bronze Certified ATX Power Supply (£51.50 @ Amazon UK)
  8. Optical Drive: Samsung SH-224DB/BEBE DVD/CD Writer (£10.46 @ Aria PC)

Total: £306.71 (correct as of 17/12/14)

I'm living without a discrete graphics card (unless the build demonstrates a need to reconsider) and I'm recycling an existing TP-Link wireless card for networking. The speakers will probably be my existing DELL setup until I can afford a sound bar and I've already recycled a 1TB hdd from my busted NAS.

Control will be via my existing Logitech K400r wireless keyboard & my Samsung A3 advance smartphone.

The operating system will be Linux Mint 17 (obviously) although I have considered openelec. The media centre will be Kodi (formerly known as XBMC).

Criticism & advice welcome!

Sources & References:

Reconnecting With Your SSH Server after an Upgrade

I recently got around to updating my file server's operating system (from Mint 16 to Mint 17) and, in accordance with the law of unintended consequences, I found that I could no longer access my files using secure shell!

What I did get was an error message telling me that the host key verification [test had] failed. When you think about it, I should have anticipated the problem, after all, the original key was hashed under a different implementation of SSH Server as well as a different operating system! Fortunately, the fix is quite simple, particularly if you're only connecting to one host.

For a Single Host


Navigate to to the .ssh folder in the home/username directory (username will be unique to your circumstances). Remember that the period (full stop) indicates that this is a hidden folder, so you should ensure that you have the Show Hidden Files option enabled in your file browser. Delete the known_hosts file in the .ssh directory.

Now reconnect with your SSH host and a new key will be created following the usual warning that this is a new (and unknown!) host.

For Multiple Hosts

The error message will identify a line number in the know_hosts file; make a note of the number and open a terminal:

gksu gedit /home/username/.ssh/known_hosts

You will be prompted for your password. When the file is opened, delete the offending line, save the file and reconnect with your server. You should be prompted to recreate the key as if this were a first connection.

If you accidentally delete the wrong line (or the whole file, for that matter), fear not, the individual keys will be recreated when you next connect to your SSH server(s).

Sources & Resources:

  • None

Setting Up Yatse Remote Control for XBMC

My recent project to repair and consolidate my music library seems to have taken on a life of its own!

You may recall that back in September, my NAS failed leaving me with a spare 1TB hdd. Having fixed my music library, I decided to back-up my DVD library and build an HTPC around the redundant drive: it's taken months and I'm nowhere near finishing! Last night, the DELL Dimension, the DELL Inspiron, & the Compaq CQ60 were all backing-up movie files.

Designing a PC to fit around the drive has been fun, and I think that I can build a first-class rig for around £300 but money is a real issue at the moment and I've had to make compromises. One consideration is how to control the rig from my sofa: originally, I'd planned to use my Logitech K400r wireless keyboard (from my file server), saving myself a few quid on an IR remote control. However, on yesterday's RSS feed, Maximum PC did a piece on getting started with XBMC and I came across a reference to a smartphone app called Yatse XBMC also offers an official remote, which under test, is just as good but a little more difficult to set up.

Downloading and installing Yatse on your Android phone or tablet is simple (just head over to the Google Play Store & search for xbmc remote or Yatse), the basic app is free. However, getting the app to play nice with XBMC can be a little tricky! When you open the Yatse app, you should be prompted to add a server (called Host in Yatse). The nice thing with this app, is that the wizard does quite a lot of the work for you - you should only need to select the Host, add a username and a password (if you've enabled them in Kodi/XBMC. However, the setup may fail if you're running a firewall on your Linux box.

If you are running a firewall (and you should be!), you'll need to open a couple of ports for Yatse or XBMC Remote to work properly. Open a terminal and do:

sudo ufw allow proto tcp from 192.168.1.0/24 to any port 8080

Followed by:

sudo ufw allow proto udp from 192.168.1.0/24 to any port 9777

You may need to change the ip range to suit your router and, depending on your version of Kodi/XMBC, your tcp port. Unless you've done something very unusual on your system, the udp port should be left at the default value of 9777. In Kodi Gotham, you can check your tcp port under System > Settings > Services > Webserver, but I suspect that it will be a similar route in earlier versions.

Sources & References:

Saturday, 1 November 2014

Quick Tip - Auto Shutdown

I'm currently copying some video files to my network drive so that I can stream them through the house. It's a time consuming business so it makes sense to batch some up to copy overnight. However, being tight, I hate the idea that the system will be idle for hours after the task is finished, needlessly consuming power. The solution is simple; tell the system to shutdown automatically at a set time.

Estimate your shutdown time and open a terminal:

sudo shutdown -h hh:mm

where hh:mm is the time (in 24 hour format). So, to close my system at 03:00am:

sudo shutdown -h 03:00

I type in my password, turn of my monitor (and any other peripherals) and go to bed!

Sources & References:

  • None

Monday, 20 October 2014

Quick Tip: Fixing Album Art

Having recently ripped an album to my file server, I couldn't get the album art to display in xbmc. The solution turned out to be changing the file permissions to read/write for all users & groups.

Sources & References:

  • None

Happy Birthday Ubuntu

Happy birthday to Ubuntu: ten years old today!

I for one am grateful for the adventure.

Sources & References:

Sunday, 19 October 2014

Fixing mp3 Track Duration Errors

I recently converted my music collection to the mp3 format; however, whilst the playback quality is excellent, many of the tracks had erroneous track duration data. This wasn't a particular problem until I copied some of the tracks to my phone which started crashing while playing music and I began to suspect the duration error as the culprit.

Changing duration is not as straightforward as fixing tags (easily achieved using EasyTAG) but there is a great app in the Software Center for doing just that, MP3 Diags.

Track duration errors are caused by missing, incomplete, or corrupt variable bitrate (VBR) headers:

"There are 3 kinds of VBR headers: Xing, LAME, and VBRI. MP3 Diags identifies files having an incorrect or missing VBR header, and allows you to create Xing headers, should you need to." Source: MP3 Diags, MP3 Introduction

Warning, following this advice may corrupt your music files - backup first!

Despite the rather dire warning above, I've experienced no data loss or corruption (at least, none that I've found) and this great app has repaired all of my track duration errors and one or two other issues as well!

If you're using Ubuntu or one of it's derivatives, the best installation option is the Software Center. Open the Software Center and search for mp3diags - don't put a gap between mp3 & diags or you'll only be offered the MP3 Diags documentation. Simply install as usual.

When you open the app you must scan your files for errors. Just click the gear icon (1st on the left of the toolbar) and the browser will open. You can also scan remote files if you have mounted them using SSH: in Mint the route is a little convoluted, try:

run/usr/1000/gvfs/sftp:host=server,user=user/

...and then look for your music directory. Select your directory and then hit the Scan option. This can take several minutes on a single remote directory (album), so patience will be needed if you have a large music library with lots of errors. My repairs took over a week on a modest (3,500 track) library.

If the scan reveals any Xing errors, repair them by clicking the single transformation icon (a hammer with a green arrow) and selecting the Repair VBR data option.

Sources & References:

Sunday, 5 October 2014

Fixing The Internal Microphone - Presario CQ60

It's taken weeks of Googling, but I've finally found a fix for the internal microphone on the Presario CQ60.

I had no luck with the various fixes that I found online until I came across this post which, if I've understood it correctly, suggests that the problem with the internal microphone on the CQ60 is not a software issue but a hardware problem. As I understand the OP's problem, the kernel allocates the wrong pin id at boot: the workaround turns out to be surprisingly simple.

First we need an application developed by David Henningsson at Canonical. It's called HDAJackRetask and it was originally developed to turn unused microphone jacks into additional headphone jacks - brilliant! It's now part of the alsa-tools-gui, so there's no need to add a new repository. Open a terminal and do:

sudo apt-get install alsa-tools-gui

Alternatively, you can download it from the Software Center or Synaptic. When prompted about the additional space (in the terminal method), type y and hit enter.

Open HDAJackRetask from the Main Menu (in Mint Cinnamon it's under Sound & Video). Select your sound card and then, under the Options panel, check the Show unconnected pins option. In the Pin configuration section, look for your Internal Mic, Riser entry, click the Override checkbox, and set the spin button to Not connected.

Next, look for the Pin ID: 0x1d, check the Override checkbox, and the use the spin button to select Internal mic. Now click the Apply now option and test your microphone. If all's gone well, it's time to make this a permanent change: click the Install boot override. You'll see the following message dialog: click OK and reboot.

Sources & References:

Wallpaper of the Month: Presario CQ60

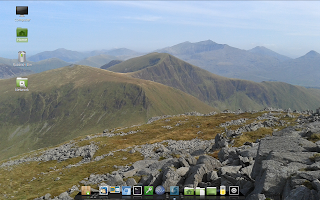
There never seems to be enough hours in the day and I have a pile of topics that I want to get published here on Karmic Odyssey but haven't (yet) had the time. Nonetheless, posting my wallpaper for all to see is a cheap post and often gets the ball rolling: for my first post this month, here's the new desktop for the Presario CQ60

This is Llyn yr Arddu looking west towards Moel Hebog. It's another image taken with my Samsung Galaxy which is rapidly proving that I don't need to carry a large (and heavy) camera on the hills.

Sources & References:

  • None

Sunday, 28 September 2014

SSH - Sharing Privately

Apart from loving the look and feel of the Cinnamon desktop, Mint 17 has another attraction over some other Ubuntu derivatives such as Lubuntu: Secure Shell (SSH) has native support from the file manager GUI.

Many of my posts over the last four years have been about networking & file sharing using Ubuntu and I have used (and promoted) Samba as the solution to my particular circumstances. However, recently I have become increasingly aware that Samba is not without its problems, particularly read/write permissions and lock files on the remote server. These problems aren't terribly serious and there are ways to work around the issues; but I want my file server to be just that and I don't want to find workarounds for simple file sharing on a private network.

As an example, you may know that I spend much of my free time in the mountains of North Wales and take some of my pictures on my mobile (cell) phone. Rather than slip the ssd out of the phone and into a card reader (meaning that I have to stop the card and disassemble the phone) I normally use Bluetooth and set up a personal area network (PAN) to transfer the files to a laptop or desktop. Using Samba, I find that I can't simply copy the new files to my pictures directory on the server because I don't have the necessary permissions. Try as I might, I can't seem get the read/write access right. I've also had problems with GnuCash, meaning that I have to use the program on the server to update my finances - not ideal!

Using Secure Shell to connect to my server resolves all of these permission issues at a stroke and, for all intents and purposes, it behaves exactly the same as accessing local files. It has the additional advantage in that directories on the server do not need to be shared in the conventional sense and that makes them accessible only to me (or anyone that steal my login credentials).

To access your files you need only to invoke the Connect to Server... dialog from Nemo (File > Connect to Server...) and provide the necessary details.

If you've set up Samba to recognize netbios names, then it's pretty straightforward: the port default for SSH is 22 (and will only change if you've changed it!). Once connected, you can access your files and directories from Nemo's GUI and use them locally. This may be overkill on a private network, but using SSH also resolves another irritating problem: file lock. Using Samba, if an application wasn't closed before shutting down the client pc, the file lock would remain on the server (effectively making the file, read only): SHH seems to resolve this problem because Nemo is closed down as part of the normal shutdown sequence.

One final tip, if you're having trouble connecting to your server, check that ufw is allowing incoming traffic on port 22:

sudo ufw allow proto tcp from 192.168.0.0/24 to any port 22

Sources & References:

Friday, 26 September 2014

CQ60 - Reminted

It wasn't long before the new Presario CQ60 ran into problems: despite managing to achieve stable graphics using Mint 17 Mate, I couldn't seem to maintain a persistent WiFi link. Often, the hardware button wouldn't work and, even when it did, it rarely made a difference as to whether or not the laptop connected to my network. Issuing the terminal command:

rfkill list

would show the hardware blocked and the command:

rfkill ublock all

had no effect. It was sometime before I realized that this is by design! It was clear that I had to find a way to make the hardware switch work if I wanted this laptop to be more than a vanity project.

Having read some comment online that Lubuntu had a more reliable wireless platform, I installed the latest version (14.04 LTS) of the Ubuntu derivative to see if it made any difference: it did, effectively ruling out hardware as the source of the problem. Had I merely wanted a functioning laptop I could easily have left the lightweight operating system in place but, whilst this is undoubtedly a viable solution, the truth is that I'm not terribly keen on Lubuntu and I really love Mint Cinnamon. There are also some practical networking reasons for preferring Mint over Lubuntu (specifically, native SSH support) and I want to migrate from SAMBA to manage my network, so the research effort began!

This problem with the Presario is not entirely unknown and it seems that there is no single solution. Nonetheless, there does seem to be an online consensus that replacing the ath5k driver for the Atheros chipset for the ath9k driver is the most successful fix and I resolved to give it a try. However, fate intervened to scupper my plans.

At some time on Wednesday of this week I lost my WAN connection: this makes testing a WiFi connection problematic! It was twenty-four hours before the restoration of my connection and I didn't get around to reinstalling Mint until late yesterday afternoon. I decided to go for Mint 17 Cinnamon and, as always, the WiFi connection was flawless on the live disk but, more importantly, it was also flawless after installation to the ssd and I have no idea why! This condition has persisted beyond the initial (307MB) software updates and countless reboots (both restarts & cold boots), so I'm assuming that the problem is resolved. I can only identify two candidate processes that may have influenced this change in fortune:

  1. I didn't format the /home partition during installation but used the existing partition that I set up when I installed Lubuntu.
  2. I had to reset my hybrid router yesterday in order to re-establish a link to the WAN when my connection came back up.

It's not clear if either or both of these changes had the desired effect, but I remain connected a day after installation!

Having also had some unpleasant experiences with the graphics drivers during previous implementations of Mint, I decided to install the nvidia-304 legacy driver right off the bat and it has proved to be a good decision. Sure, the boot sequence isn't as pretty as it would be using the default nouveau driver, but, with the improved boot time delivered by the new ssd, who cares? Moreover, there is absolutely no flicker or distortion during operation and I now have a stable (as well as, connected) Mint 17 Cinnamon installation.

This little laptop has exceeded expectations although it has proved to be quite a challenge to get it running the Mint OS. The irony is that, despite learning a great deal about networing drivers in Ubuntu, I can offer no explanation as to why the problem has been rectified but I'm thrilled that they have been.

Sources & Reference:

  • Ubuntu Manual Pages: rfkill (see ublock)
  • Lubuntu: Home

Saturday, 20 September 2014

Compaq Presario C60 - Minted

Well, this is my first post from the Compaq Presario CQ60 found in a dumpster a week ago! It's been an interesting repair project and one that has had me scratching my head a couple of times: but I think I finally know why the previous owner abandoned this cracking little machine: dust!

OK, first the low-down on the specs (and I use the word loosely). This is no speedball (even when it was new): it was originally designed to run Microsoft Vista and one wonders how well it managed that! The processor is an AMD Sempron SI-42 - so no records broken there even with 3GB of memory! That said, the previous owner loved this machine and there is very little damage. Moreover, the 15.6" screen is superb.

My daughter Lozzy installed the new hard drive; a 60GB Corsair ssd that I picked up for less than £40. The battery was as cheap as I could find (around £12) and I really don't expect it to last very long. So, all ready to install an operating system. This is where the problems started: this laptop hated Mint Cinnamon and the graphics stack crashed on every boot regardless of the driver I installed - on to Plan B.

We had much more success with Mint Mate and, after loading the legacy NVidia driver, even the graphics stack behaved. Now, if we could only solve the problem of the system running hot (and I do mean hot!) we'd have a nice little system. The heat problem was a real issue with bottom of the case almost too hot to touch just a few minutes after booting. There's no fine fan control in the bios and eventually I was forced to strip the machine to clean the cooling system. I've seen worse but there was quite a build up of dust and lint and cleaning it has resulted in an almost silent case fan: that's better for battery life and performance.

The new battery is giving surprising performance with a couple of hours per charge and the ssd gives a boot time of less that 50 seconds. It's not a stunning performance, but it 's not bad for £50.

Sources & References:

  • None

Thursday, 18 September 2014

Inspiron 6400 - Wallpaper of the Month

A stunning day in Snowdonia National Park yesterday has prompted an early change in my desktop's wallpaper!

This is taken on my phone (a Samsung Galaxy S3 Advance). The view of Snowdon (in the distance) is taken from the Nantlle Ridge looking (roughly) north east over Mynydd Drws-y-coed.

Sources & References:

  • None

Tuesday, 16 September 2014

Rotten Apple - Your Data & The Cloud

Something for nothing is good right? Well, not always. Apple's recent decision to interfere with users' cloud accounts without permission has caused a little controversy: notwithstanding the Company's dreadful taste in music, foisting music on customers who didn't ask for (and who don't want) it demonstrates utter disregard for customers' privacy (not to mention the associated security implications).

Following the public outcry, Apple has subsequently released a way to delete the offending album, but the affair highlights a bigger issue: if you give your data to a third-party to look after, you no longer control you data! Hand it over at your peril.

Sources & References:

Friday, 12 September 2014

Another Careless Owner!

Last year I reported on finding an old Compaq C700 in the recycling skip: well, I've just found another in the same skip! This one's a Compaq Presario CQ60 & I managed to recover a working charger at the same time.

My first thought was that this would be suffering from a shot screen (all too common with Compaq laptops), but it's not and I can find absolutely nothing wrong with this little beauty. Apart from needing a new battery (I couldn't find the original) and hard drive (sensibly removed by the original owner), this laptop is perfectly operational right down to the webcam. There's no damage to the case aside from the marks and scuffs associated with normal wear & tear. That is, if you ignore the missing rubber bumper on the bottom of the case!

I've gone for a cheap battery (I don't expect it to last more than twelve months) but a 60GB solid state hard drive - I really do want to see how much of a performance improvement an ssd will deliver and I have no need for a massive hard drive. Total repair costs are circa £50.00 and it's a project for my daughter, Lozzy to cut her teeth on!

We won't be restoring the original operating system (Microsoft Vista) and the AMD Sempron processor probably isn't man enough to run Win7, so we'll run Mint 17 and keep this as a play thing.

Sources & References:

  • None

Sunday, 7 September 2014

NAS Woes

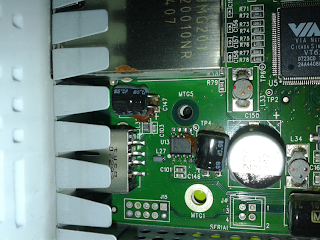
Some years ago I made the mistake of buying a Western Digital network drive - there's a reason that they're cheap! Anyway, this week the hard drive failed (or so I thought) and this morning I took the enclosure apart only to find that it was the capacitors that had given up the ghost.

blown capacitors in WD network drive
What's All that Goo?

Because the drive uses hardware encryption, the data is unreachable: I can't even mount the drive to attempt a recovery. Assuming that the drive is still healthy (smartctl -H results in an access denied error message), I'm faced with several options:

  • Try to recover the data by finding a replacement enclosure with the same model number (yeah, good luck with that!)
  • Try to recover the data by repairing the pcb (replace the burned capacitors)
  • Sacrifice the data and reuse the drive building my own NAS

Most (but not all) of the data is already safely on my file server. I've lost some video but everything else is either duplicated or replaceable so, option 3 is looking favourite! I'm toying with the idea of a low-powered box running FreeNAS or perhaps even a Intel's NUC. I even looked into using a Raspberry Pi!

I've accepted that the data is gone and that I should probably format the drive, but I really can't decide on (or afford) a replacement. I'll mull it over but, in the meanwhile, my advice is to avoid Western Digital drives if you value your data.

Sources & References:

  • None

Wednesday, 27 August 2014

Quick Tip - Minification In Linux

Often, when building and testing a website, you may be working with two or more style sheets. However, before uploading your site it's best practise to merge your css files in order to reduce any lag between request and response. There are several tools available to achieve this but Linux has its own command line tool, cssmin.

To install cssmin, open a terminal and:

sudo apt-get install cssmin

Enter your password and allow the application to install. To merge your style sheets:

cat file1.css file2.css file3.css | cssmin > output.min.css

Where filen.css are the source files and output.min.css is the output file. Obviously, you will need to link your html files to the new style sheet.

Sources & Resources:

Saturday, 23 August 2014

Wallpaper of the Month - Inspiron 6400

You probably already know that I change the desktop backgrounds on my computers regularly - time for a change on the Inspiron 6400!

Another of my own compositions taken from (roughly) SJ 177 398 between Y Foel & Vivod, looking east. This is another photo taken on my mobile phone; a Samsung Galaxy Advance S4.

Sources & References:

  • None

Friday, 22 August 2014

More On Win98 & Ubuntu

Last year I built a bespoke system in order that a customer could run Win98! My solution was to build a modern desktop running Ubuntu and virtualize the legacy system using Virtualbox. Despite my business having long since failed, I've remained on friendly terms with my erstwhile customer and was happy to help him upgrade Ubuntu 12.04 to 14.04LTS.

I've always preferred clean installs rather than the in-place upgrades and I partition my drives accordingly (and did so on this build also): so, I decided that I would do a fresh install on the Win98 host machine and didn't anticipate any difficulties getting Win98 up & running. How wrong I was!

Installing the latest version of VirtualBox & the extension pack was simple enough, but whilst Windows ran inside VirtualBox without any drama, it positively refused to communicate with any of the hardware: this meant that there was no USB support so neither the dot matrix printer (a deal breaker) nor USB pen drives would work. It turns out that I'd missed a couple of key (but simple) steps to getting the virtual machine operating effectively.

The first was to add the user's account to the vboxusers group. This is straightforward in Ubuntu & its derivatives, simply add the gnome-system-tools package from the Software Center. You can access the utility from the Administration menu (Mint) or search via Unity (Ubuntu).

The second is to make sure that the USB controller is selected in the virtual machine's settings but that the USB 2.0 (EHCI) controller is deselected.

Once these two issues were rectified, Win98 was once more doing its thing!

Sources & References:

  • None

Tuesday, 19 August 2014

Munich To Reverse Decision On Linux?

The Register is reporting that Munich, the city that adopted Linux for its municipal operations, is considering returning to Windows.

The reasons are not entirely clear but El Reg seems to believe that it is the lack of an integrated personal information manager à la Microsoft Outlook. If this is, indeed, the reason, it seems more likely that this is an implementation issue rather than a shortcoming in any given Linux distro: Thunderbird gives me integrated email, contacts, and calendar (albeit by installing plugins) & I can even sync with my Google Calendar (so that those nice people at the NSA can see what I'm up to!). Thunderbird is not the only option when it comes to PIM on Linux.

I think it would be a shame if this ten-year project were abandoned on a political whim. Whilst I've no beef with Microsoft, politicians have a duty to be parsimonious with tax payers' monies & paying huge sums to private corporations when there are free alternatives is outrageously extravagant.

As an illustration of the sort of money that Microsoft can earn from bulk licensing, consider Cardiff Councils response to a freedom of information request: in 2011, the Council acknowledged having nearly eleven thousand MS Office licences at a cost (to the taxpayer) of £2,158,696. If one extrapolates this cost over the 27 county councils in the UK, that's a staggering £58,284,792 & there are another 400 principal authorities in the UK! Given that the implementation costs of OpenOffice would be broadly similar to MS Office (& hence, irrelevant to our calculations), abandoning only Office in only the county councils would save every man, woman, & child in the UK, £1!

Sources & References:

Tuesday, 12 August 2014

Wallpaper of the Month - Mint 17

After work and a walk in the hills, I finished up configuring Mint 17 on my Dimension 8400. If runs like a trooper: not the quickest pc in the world (it is ten years old!), but stable and beautiful!

So, to christen my new OS on my old machine, here's a new wallpaper. The bundled backgrounds in Mint 17 are fabulous, but I've been missing Snowdonia of late so I thought I'd use one of my own compositions.

This is Llyn Dulyn in the Rhinogs: one of the most beautiful places in Snowdonia. Taken in September '12, the photo is snapped from Diffwys looking North towards Y Llethr & Rhinog Fach.

Sources & References:

  • None

Monday, 11 August 2014

Mint 17 Cinnamon & The DELL DIMENSION 8400

This month (August), my DELL Dimension 8400 is ten years old & it's getting a birthday present - a new operating system!

"I'm constantly amazed at how well Ubuntu runs on older equipment."

I had been running Mint 16 on the old box, but as this is no longer supported, it's time to see how well Mint 17 will run.

Installation was, as always, painless, although I can't install from a DVD on this box (it has to be a USB). I've also taken the opportunity to encrypt the /home directory & change my password. Now I've got to:

  • Install Samba & Winbind
  • Enable UFW
  • Install my Photosmart 7600 (yes, a 7600!) local printer & my Photosmart C6280 network printer
  • Install Chromium
  • Install Bluefish
  • Install Cairo-Dock

...well, you get the idea!

Sources & References:

  • None

Sharp End of the Pencil - Wireframing On Linux

More on the subject of Windows alternatives.

I have some elementary skill in coding with html but, like everything else, I'm more jack-of-all-trades than expert. Nonetheless, I've never been frightened to have a go, and recently I've been exploring the concept of responsive web design for a project that I'm working on.

The key to success is planning the layout for different platforms before building your style sheet and it's handy to be able to visualize the site on each platform using a wireframe tool. There are several online offerings (for instance, codiqa & balsamiq), but is there a local software alternative for Linux?

There is and it's called Pencil!

In fairness, Pencil is available across all three major platforms (Win, Mac, & Nix) so it doesn't really qualify as a genuine alternative but it does meet the criteria for free software in that it is both free of charge and open source. It's also remarkably comprehensive and simple to use so, if you're into web design, head on over and download the flavour of your choice.

Sources & Resources:

Sunday, 3 August 2014

Migrating From XP - Outlook Express to Thunderbird

More on the theme of migrating from Windows XP to Linux. As always, my focus is on Ubuntu and its derivatives, but I suspect that the following process will work for any Linux distro.

One of the concerns that I've encountered when trying to encourage XP users to try Linux is that of migrating data from one OS to another. Usually, this isn't for any utilitarian reason, it's because the user doesn't have a current backup and is (ultimately) terrified of loosing years of work! However, moving (and using) data from Windows to Linux is relatively painless, but what about all that email that's accumulated over the past ten years?

I was recently asked how a user could move all of their email and settings from Outlook Express and use them on Linux. If you're using Thunderbird on your target system, migrating all of your Outlook Express data and settings is fairly easy. Although it's not exactly straightforward or intuitive, it is simple. I've tested the following instructions using a virtual WinXP system and Mint 17 and it takes longer to record what I did than actually do what I did! (if that makes sense!)

The problem is that you can't simply dump all of your Outlook Express data into a file and import it into a new machine: you have to import the data into Thunderbird and then copy your user profile to the target PC. So, the first thing we have to do is download and install Thunderbird on your Windows XP machine. A standard installation is all that's required.

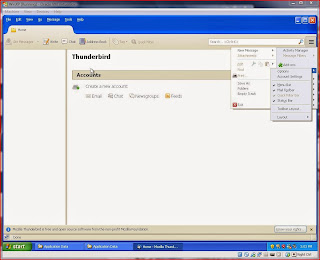
Open Thunderbird and skip the New Email dialog (just click the I think I'll configure my account later" option). If the Menu Bar is hidden, click the menu option (just to the right of the search dialog), hover over Options & then click Main Menu.

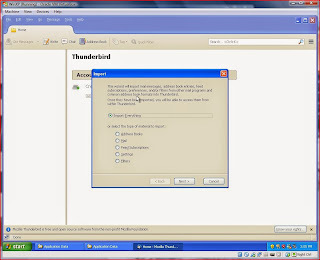
From the Main Menu, click Tools & then Import... When the Import dialog appears, ensure that the Import Everything (default) option is selected and click Next.

Select the Outlook Express option is selected and then click next. When the import process is complete, close Thunderbird completely.

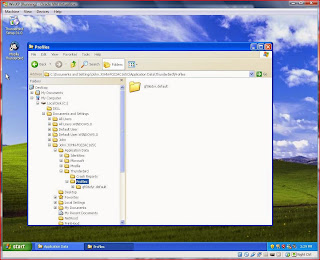
Now copy your new Thunderbird profile directory. This can be tricky to locate, but you should find it in:

C:\Documents and Settings\User Name\Application Data\Thunderbird\Profiles.

Your profile will have a random eight digit alpha-numeric string followed by a period (full stop) and the word, default: copy this directory (file) to a USB stick or other portable medium.

If you're changing operating system on the same PC as your Windows XP rig, safely remove your external medium and continue with your installation. If not, just plug your USB stick into the PC to where you want to migrate your data. If your target pc does not have Thunderbird installed, install it from the Software Center (assuming Ubuntu or derivative) or from the Mozilla Downloads page.

Make sure that Thunderbird is closed and that you have selected the Show Hidden Files option in your file browser. Plug in your removable medium (assuming that you haven't already done so) and copy the contents of the WinXP profile to your new Thunderbird profile on the target PC. You'll find the relevant directory under:

/home/user_name/.thunderbird

DO NOT substitute the parent directory from Windows for the parent directory in in .thunderbird: this will cause an application error. Only copy the contents from the old directory to the new directory, overwriting any existing files in the new location. Now open Thunderbird: in the System Integration dialog, select the Set as Default option and you're good to go!

Sources & References:

Saturday, 19 July 2014

Going, Going....

...not quite gone

But, time is running out to retrieve your files from Ubuntu One.

This is the FINAL reminder to make sure you have retrieved all your data from Ubuntu One filesync, as we will be deleting all the content permanently on 31st July 2014. After that date, we will no longer be able to retrieve any of your files.

In order to make it easy for you to retrieve all of your content, we have released a new feature that lets you download all your content at once. Our website (https://one.ubuntu.com/) has been updated with instructions on how to conveniently download all your files.

In addition, you still can use Mover.io's offer to transfer your data to another cloud provider for free. The Ubuntu One web interface is available for you to download individual files as well.

All of us in the Ubuntu One team would like to thank you for your support over the years.

The Ubuntu One team

Sources & References:

  • None

Saturday, 12 July 2014

If I'm A Suspect...

...Go to court, get a warrant and tap my communications - it's that easy!

I'm not a [insert religious/political preference here] terrorist, I'm not a paedophile, and I am not a convicted criminal - so why should my data be intercepted & retained by my own (and other) government for no better reason than the just-in-case justification? Passing emergency legislation in an attempt to ignore a court judgement is an outrageous abuse of political power!

"We are told this is a paedophile and jihadi 'emergency', but the court judgment they seek to ignore was handed down over three months ago and this isn't snooping on suspects but on everyone." Shami Chakrabarti

Oh, that's right, I also live in one of the most watched countries in the world. So much for living in a democratic nation! I wonder if Canada will have me...

Sources & References:

Password Mantras

My apologies, ordinarily I avoid post trawling, but I came across this essay via my Schneier On Security rss feed this morning: it made me smile.

Whilst I kind of like the idea that a password can be life changing and interesting,the fact is that these kind of sentence/word-string passwords can be (and are being!) cracked. If you want a memorable password, I still recommend the Schneier method or, use randomly generated passwords and keep them in a password safe.

Sources & Resources:

Sunday, 6 July 2014

He's Behind You: NSA & Tails

It seems that my posts about Tails may well have brought me to the attention of the NSA. Several news outlets are reporting on the NSA's use of a data slurping tool called XKeyScore. The scope and capabilities of this program are disputed (I suppose that's a necessary consequence of it being secret), but it's clearly designed to invade the privacy of non-American citizens.

"It's hard to tell how extensive this is. It's possible that anyone who clicked on this link -- with the embedded torproject.org URL above -- is currently being monitored by the NSA. It's possible that this only will happen to people who receive the link in e-mail, which will mean every Crypto-Gram subscriber in a couple of weeks."
Bruce Schneier

Whilst I'm not an American citizen, it's nice to know that the NSA should be interested in me :) Nonetheless, insofar as I am aware, I have not been accused of any crime and I believe that I am granted the right of privacy under Article 8 of the European Convention on Human Rights (Liberty's interpretation of Article 8 & see also the UK's 1998 legislation) so it's not entirely clear why my own government would not only condone this invasion of privacy but also to participate in the wholesale data collection effort spearheaded by my American cousins.

I can feel a strongly worded protest to me MP coming on!

Sources & References:

Thursday, 3 July 2014

The XP Conundrum - It Can Only Be Love

I probably over-thought my recent acknowledgement that Linux is unlikely to ever temp XP users: I think there's probably a simpler explanation than the difficulties of adopting open source!

Figures published by both Newmarketshare and Stat Counter suggest that XP is alive and well and has even (slightly) increased its market share month-on-month. Windows 7 is way out on its own with over 50% of the market and Win 8 seems to be the new Vista.

The picture in the UK is slightly more encouraging for Redmond with Win XP at just 7.4% of the market but Linux remains less than 2% of both world & UK markets.

So, it seems that users are simply refusing to abandon their beloved XP unless it's for Windows 7. So much for my theory!

Sources & Resoruces:

Sunday, 29 June 2014

Eric The Half-A-Bee

Over the last couple of days, I've been using Allen Downey's excellent resources for brushing up my Python skills. For my interpreter, I use the Eric Integrated Development Environment and it works flawlessly on the laptop. However, I couldn't get it to install on the Dimension 8400. Summoning the application from the terminal resulted in a segmentation fault.

Fortunately, if you experience the same problem, you can install the program manually:

Download the latest stable version from the Eric SourceForge page to your Download folder. Select the latest version, and from the following directory, select the .tar.gz file. Then, when your file has downloaded, navigate to the file in the file manager of your choice, right-click the file and select the Extract Here option.

Open a terminal and change your directory to the extracted folder:

cd /home/[user_name]/Downloads/ericversion_number

Now, install the program with:

sudo python install.py

That's it! Now you can enjoy Monty Python's track, Eric the Half-A-Bee.

Sources & Reference:

Tuesday, 24 June 2014

Why I've got a Taste For Cinnamon

There comes a time when you just want stuff to work. Windows & Mac users have enjoyed this feature for years and, if Linux wants to be viewed as a viable alternative, it (at least, the stable versions) has to emulate its competitors.

The other issue facing Linux distros is that the release/support cycle must be longer if Windows users are to be persuaded to abandon their point & click systems. Ubuntu has led the way in this regard and it's nice to welcome the fabulous Mint distro to the long term support stable.

But, is Mint a viable system for new users? With the Petra release's forthcoming end-of-life, it was time to upgrade the various pc hanging around the apartment and an ideal opportunity to evaluate its potential as an out-of-the-box operating system.

As I'd been using (and thoroughly enjoying) the Mate desktop since migrating my systems from Ubuntu, I thought I'd simply upgrade to Qiana (17) using the GNOME 2 successor and maintain some continuity between releases. Installing Linux Mint's new LTS release on Inspiron 6400 was painless enough and the OS looked as great as ever but I had some niggles:

  • The wireless network applet left an on-screen artefact after displaying notification pop-ups.
  • Cairo Dock would flicker on mouse hover.
  • The main menu wouldn't always activate on demand.
  • Bluetooth wouldn't accept transfer requests even after installing Blueman.

To be sure, these are minor problems and I'm confident that, with a little effort, they could all be resolved. Nonetheless, whilst I've always been happy to tweak my Linux systems to get them working to my satisfaction (and I hope that this Blog bears testimony to that claim), for once it would be nice to have a system that worked out of the box. So, rather than spend hours resolving these problems, I thought I'd see if the Cinnamon desktop gave me any more joy.

Just like it's stable-mate, installing Qiana with the Cinnamon desktop is easy and it looks even more stunning than the Mate desktop. Even better, on the DELL Inspiron, the menu works as it should and there are no strange artefacts to worry about.

So far, so good. But, does Bluetooth work? Well, not out-of-the-box: but simply installing Blueman resolves the transfer problem and you can do that without even opening a terminal by installing from the Software Manager. Only Cairo-Dock to sort out and I'd already found the answer to that problem!

Ok, so not quite out-of-the-box: as always I had to install the b43 WiFi driver and setup Samba to get network shares but I'd have to do that with any Linux distro. This will always be a barrier to casual Windows users adopting Linux. Nonetheless, Mint is as close to the real deal as Ubuntu and, in my view, looks better. Moreover, Mint is more flexible and extensible: more in keeping with the tradition of Linux operating systems.

Sources & References:

Monday, 23 June 2014

Quick Tip - Fix the Flicker

If you're using Cairo Dock on Mint 17 & you are witnessing flickering when you hover the mouse over the dock, the fix is simple!

Open the Startup Applications dialog (Main Menu > Preferences > Startup Applications), select the Cairo-Dock entry, & click Edit.

Amend the Command field to read:

cairo-dock -o

This forces Cairo Dock to use the Open Graphics Library at startup and should resolve any flickering problems.

If this doesn't do the trick, try using the Cairo backend:

cairo-dock -c

Sources & References:

Wallpaper of the Month - Inspiron 6400

To celebrate the Inspiron's upgrade to Mint 17 (Cinnamon), I've changed my wallpaper. You've seen this one before!

This is Spitfire Lake, courtesy of Will Forbes via Nat Geographic.

Sources & References:

Wednesday, 18 June 2014

Mint Print

I've been constantly surprised delighted by Mint 16 - so delighted that all of my machines (with the exception of the Windows PC) are now running this fabulous Linux distro!

Today I had a need to print something: my normal printer hasn't had any ink cartridges for months (so infrequently do I print anything these days), so I thought I'd see if my old Photosmart 7660 could get me out of trouble. This printer is eleven years old and the later versions of Ubuntu always struggled to deliver consistent results and so, in all honesty, I really expected to be wasting my time: how wrong I was!

Plugging the printer in produced instant recognition: no fuss, no drama, and no struggle! Furthermore, the print quality was as good as when the printer was new and multiple prints are possible, something that I could never achieve when connecting it to Ubuntu.

Of course, next month I'll have to upgrade to Mint 17 (or downgrade to Mint 13) because 16 will no longer be supported. Let's hope that the new OS delivers similar excellent results.

Sources & References:

Sunday, 15 June 2014

Quick Tip - List Applications

You can view a list of installed applications using the terminal - this works in Ubuntu 14.04 & Mint 16. Open a terminal and type:

dpkg --get-selections

If you want to export the output to a file:

dpkg --get-selections > /home/[user]/Documents/app_list.txt

Change [user] to suit your circumstances.

This will place a text file in your Documents folder called, app_list.txt. Double click to open from your file manager.

Sources & References:

  • None

Friday, 13 June 2014

Getting Started With Tails

Because Tails is designed to be used as a live operating system, in many respects downloading and creating a live disk is the same as most other Linux distros. However, given that security is likely the most important consideration for users, special attention should be paid to validating and verifying the download before using the operating system. The following process is aimed at Ubuntu users, links are provided for other operating systems where appropriate.

You can download Tails from the Tails Download, Verify and Install page.

In order to verify the download, you must also download the Tails signing key which you can get from the same link. But (and this is a big but for the security conscious), how can you be sure that the key that you have downloaded is genuine? It's possible (although, not likely) that the key has been compromised by a man-in-the-middle attack and you may want to ensure that the key that you have downloaded has been signed by members of the Debian Development Team.

"Tails signing key is actually already signed by the keys of several official developers of Debian, the operating system on which Tails is based. Debian makes an extensive use of OpenPGP and you can download the keys of all Debian developers by installing the debian-keyring package. You can then verify the signatures those developers made with their own key on Tails signing key."

First, download the signature from Tails Download page to your Download folder (in this example, home/[user]/Downloads/)1 and check that the key is signed. Open a terminal and then:

gpg --import /home/[user]/Downloads/tails-signing.key

This command imports the key into your gpg keyring. In order to check the signatures, you must first locate the Tails key id: the following code will list all public keys (including the Tails key that you've just imported) in your keyring.

gpg --list-public-keys

The output will include the following entry:

pub 4096R/BE2CD9C1 2010-10-07 [expires: 2015-02-05]

uidTails developers (signing key)

uidT(A)ILS developers (signing key)

The relevant ID is the second part (BE2CD9C1) of the alpha-numeric string on the first line; using this key ID, check the signatures with:

gpg --check-sigs BE2CD9C1

The output will appear as follows:

Note the last line which warns us that: "308 signatures not checked due to missing keys". These missing keys are those of the Debian Developers and others for whom you have no public keys in your keyring. You can download the Debian keys from the Ubuntu Software Center (search for debian-keyring) or with:

sudo apt-get install debian-keyring

Now that you have access to the Debian keys, you can check to see if any of the missing keys are in the Debian keyring:

gpg --keyring=/usr/share/keyrings/debian-keyring.gpg --keyid-format long --check-sigs BE2CD9C1

By using the Debian keyring (rather than your personal keyring) the number of missing keys has been reduced to 300 telling us that eight of the signatories on the Tails key are in the Debian keyring. I think this a more elegant solution that the recommended process: checking random signatures can be both time-consuming and frustrating. Moreover, there is no need to import signatures into your personal keyring that you will be unlikely to use again. Whilst not foolproof, this should give you confidence that the Tails key that you have downloaded is genuine and can be used with confidence to check the Tails .iso file. Fortunately, this is not such a long-winded process as validating the signature!

Change to the Download directory:

cd /home/[user]/Downloads

Next, check the signature of the .iso file matches the signing key:2

gpg --keyid-format long --verify tails-i386-1.0.1.iso.sig tails-i386-1.0.1.iso

If all's gone well, you should see:

gpg: Signature made Sat 30 Apr 2011 10:53:23 AM CEST

gpg: using RSA key 1202821CBE2CD9C1

gpg: Good signature from "Tails developers (signing key) "

Don't worry if you see a warning telling you that "[t]his key is not certified with a trusted signature!", this simply means that you haven't personally signed the Tails key.

Now you're ready to burn the Live Disk. In Ubuntu you simply follow the same procedure as for all Linux Distros: in your file manager, navigate to your download, right-click the .iso file and then select Write to Disc...3. Remember that it is good practise to burn the disk at the lowest possible speed in order to reduce errors.

To use your Live Disk, simply reboot your PC using the optical drive as the first boot device.

That's it! Now you're ready to use the Tails operating system. In the next post, I'll look at the pros & cons of burning a Live USB and consider whether or not to create a persistence file.

Sources & References:

Notes:

    1. Change [user] to suit your circumstances - usually your username
    2. Remember, over time the version numbers will change: make sure that you are referencing the correct file (download) name.
    3. In some other distros (for instance, Mint) this might not be as easy. However, there are appps (such as K3B) that will burn your Live Disk: search the software center or use the link above. Windows users can use Infrarecorder to burn their installation disks.

Sunday, 8 June 2014

Tails You Win!

Whether or not you sympathise with Edward Snowden's decision to air the NSA's & GCHQ's dirty laundry in public, one thing is clear: wholesale data collection from the public network has been ongoing for sometime. Ironically, it seems, that we pay taxes so that our governments can spy on us and, whilst I don't consider myself (particularly) paranoid, Snowden's revelations and the subsequent commentary by people such as Bruce Schneier and Glenn Greenwald have certainly made me reconsider my own online behaviour and security.

In today's world of Facebook and Twitter where virtually everything seems to be shared with virtually everyone, it's easy to be persuaded by the "nothing to hide, nothing to fear" argument: however, whilst I have undoubtedly contributed to some of the pointless and meaningless garbage on the Internet1, I find myself increasingly troubled by this view. Tyranny begins when a government's purpose becomes the scrutiny of its people and it justifies its actions by promoting the politics of fear - society surrenders its personal freedom in order that a few ne'er-do-wells might be apprehended (usually, on the vague suspicion that they might have "been up to something"). Of course I'd be the first to accept that there are bad people out there, but the subjugation of the whole population in order to mitigate an already minuscule risk is, at best, overkill and one is obliged2 to question the motives of the political class!

Sadly, whatever I may think about state-sponsored data theft, the problem is not only likely to continue but also to escalate and the question becomes, what can one do to protect oneself? Snowden himself reportedly uses a Linux system called Tails to keep his online activities hidden from unwelcome attention and Schneier also acknowledges using the operating system. Although my online activities are (almost certainly) not under the same scrutiny as Snowden's or Schneieir's, I thought I'd have a look and see what Tails is, how easy it is to use, and what it offers in terms of user security.

"Tails is a live operating system, that you can start on almost any computer from a DVD, USB stick, or SD card. It aims at preserving your privacy and anonymity"

For those already familiar with the Linux concept of a Live Disk, Tails will not be an entirely alien concept. It does, however, have some interesting quirks:

  1. Tails is pre-configured for online security: all the bundled applications are forced to connect to the Internet via Tor and any that attempt a direct connection are blocked. It is the Tor network that provides the user with anonymity during an online session.
  2. The OS runs as a Live Disk by design: it makes no changes to the system OS and makes no use of the hard drive's swap files. The obvious advantage of this approach is that data from the Tails session can't be extracted from the hardware once the system has been shutdown (because the OS only uses RAM which is dynamic or volatile memory). Moreover, it also means that a user can make use of virtually any computer without leaving a trace.
  3. Encryption is built in: email, browsing, and instant messaging applications all have encryption enabled. Tails will also allow you to encrypt disks using LUKS.

Built on a Debian platform and shipped with the GNOME desktop, if you've used any of the early versions of Ubuntu, the desktop will be quite familiar and most Linux users won't be fazed by the operating environment. That said, some of the bundled apps will likely be less familiar!

Leaving aside the acquisition and installation (more of that in later posts) of this operating system, Tails is pretty simple to use if not a little slow: you'll want to use a USB stick rather than a DVD just to improve boot and application loading times (and to create a secure persistence area in the file system). Moreover, given that java and Flash are turned off (for fairly obvious reasons), the surfing experience won't be the richest you've ever enjoyed!

Having played with Tails for a couple of days, it's clearly a very classy piece of work and the developers are to be applauded for producing an excellent and secure operating system. Nonetheless, I'm not sure that I'll be migrating to Tails any time soon: it's probably a step too far in terms of paranoia.

Over the next few days I'll post hints & tips on downloading and installing the system.

Sources & References:

Notes:

1 In the interests of full disclosure, I acknowledge to maintaining both Facebook & Twitter accounts. Additionally, of course, there's also a blog (attached to a Google+) account...

2 To mangle a quote variously attributed to Courtney, Jefferson, Paine, & Lincoln: "the price of freedom is eternal vigilance"