My recent project to repair and consolidate my music library seems to have taken on a life of its own!
You may recall that back in September, my NAS failed leaving me with a spare 1TB hdd. Having fixed my music library, I decided to back-up my DVD library and build an HTPC around the redundant drive: it's taken months and I'm nowhere near finishing! Last night, the DELL Dimension, the DELL Inspiron, & the Compaq CQ60 were all backing-up movie files.
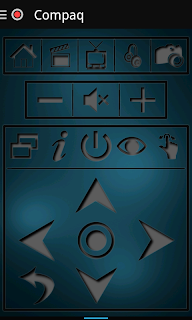
Designing a PC to fit around the drive has been fun, and I think that I can build a first-class rig for around £300 but money is a real issue at the moment and I've had to make compromises. One consideration is how to control the rig from my sofa: originally, I'd planned to use my Logitech K400r wireless keyboard (from my file server), saving myself a few quid on an IR remote control. However, on yesterday's RSS feed, Maximum PC did a piece on getting started with XBMC and I came across a reference to a smartphone app called Yatse XBMC also offers an official remote, which under test, is just as good but a little more difficult to set up.
Downloading and installing Yatse on your Android phone or tablet is simple (just head over to the Google Play Store & search for xbmc remote or Yatse), the basic app is free. However, getting the app to play nice with XBMC can be a little tricky! When you open the Yatse app, you should be prompted to add a server (called Host in Yatse). The nice thing with this app, is that the wizard does quite a lot of the work for you - you should only need to select the Host, add a username and a password (if you've enabled them in Kodi/XBMC. However, the setup may fail if you're running a firewall on your Linux box.
If you are running a firewall (and you should be!), you'll need to open a couple of ports for Yatse or XBMC Remote to work properly. Open a terminal and do:
sudo ufw allow proto tcp from 192.168.1.0/24 to any port 8080
Followed by:
sudo ufw allow proto udp from 192.168.1.0/24 to any port 9777
You may need to change the ip range to suit your router and, depending on your version of Kodi/XMBC, your tcp port. Unless you've done something very unusual on your system, the udp port should be left at the default value of 9777. In Kodi Gotham, you can check your tcp port under System > Settings > Services > Webserver, but I suspect that it will be a similar route in earlier versions.
Sources & References:
- Maximum PC: Getting Started with XBMC
- Yatse: Home

No comments:
Post a Comment